Avigilon Guides
This guide will help you diagnose and repair camera issues within the avigilon system that is deployed throughout our district.
Diagnosing camera issues
Occasionally cameras will begin displaying "Not Present" When looking in the ACC system. We need to determine what the actual cause of this failure is before attempting to repair or replace any parts.
Port Cycling - Turning port off and on
- We would like to attempt to fix the camera without having to visit the site and manually get to the camera. We can do this by cycling the port that the camera is plugged into by remoting into the switch. We can find this info in the "Camera Inventory" spreadsheet which is divided by schools via tabs on the bottom.
- Find the camera in question on the sheet named for that school and find the cell labeled "Switch\Port" (example: 10.123.40.4 / 35) for the row of that camera. The first number is the address for the switch that is powering the camera, and the second number is the port that its plugged into.
- Remote into the switch via PUTTY ( port 22 SSH) input the ip of the switch in the hostname box.
- Login with your admin credentials and press any key to get to the main interface. The name of the switch should be displayed, ie MMS-MDF1-SAL03# .
- Next we want to type " con " to get us into configuration mode
- Then select the port you wish to cycle by typing "int 35" to select interface 35
- With eth-35 displayed, type "no power" and press enter, then type "disable" and press enter and wait 10 seconds.
- Next we want to type "enable" and "power" to turn the power and data back on for that port. =
This will power the camera down completely and sometimes bring the camera back online.
Swap Patch Cable -
- There are two patch cables per camera, one at the camera and one in the IDF/MDF. Using the same information retrieved in the cycling step we can identify the cable from the switch to the patch panel for each camera. Try replacing this cable first and moving it from one switch to another to rule out issues with the switch and that cable.
If camera is still not communicating you will need to open up the camera housing.
Inspect Physical Camera -
- If you goto the physical camera and open the housing and find it has activity lights on but is not communicating, you can hard reset the camera by pushing the reset button on the camera with a paper clip and holding it for 30 seconds or until all lights turn off. This will usually bring it back online however it's settings will revert to default so it will need focused and compression settings restored.
Replace camera -
- If you open the housing and find no lights on, swap in a new camera to and ensure it powers on. If it powers up like normal the old camera is failed and needs replaced.
Downloading Security Footage
With the Avigilon software open you will find the camera with the footage you would like to download as is shown.

From here you can either right click the displayed view and click on ‘recorded’ or you can find the button in the top left corner which says recorded and that will bring you to the stored footage.
At the bottom of the screen you will see the timeline with the red blocks which indicates the cameras saw motion and were recording. When you have found the event or if you already know the specific time you will right click the timeline bar and click “add export”
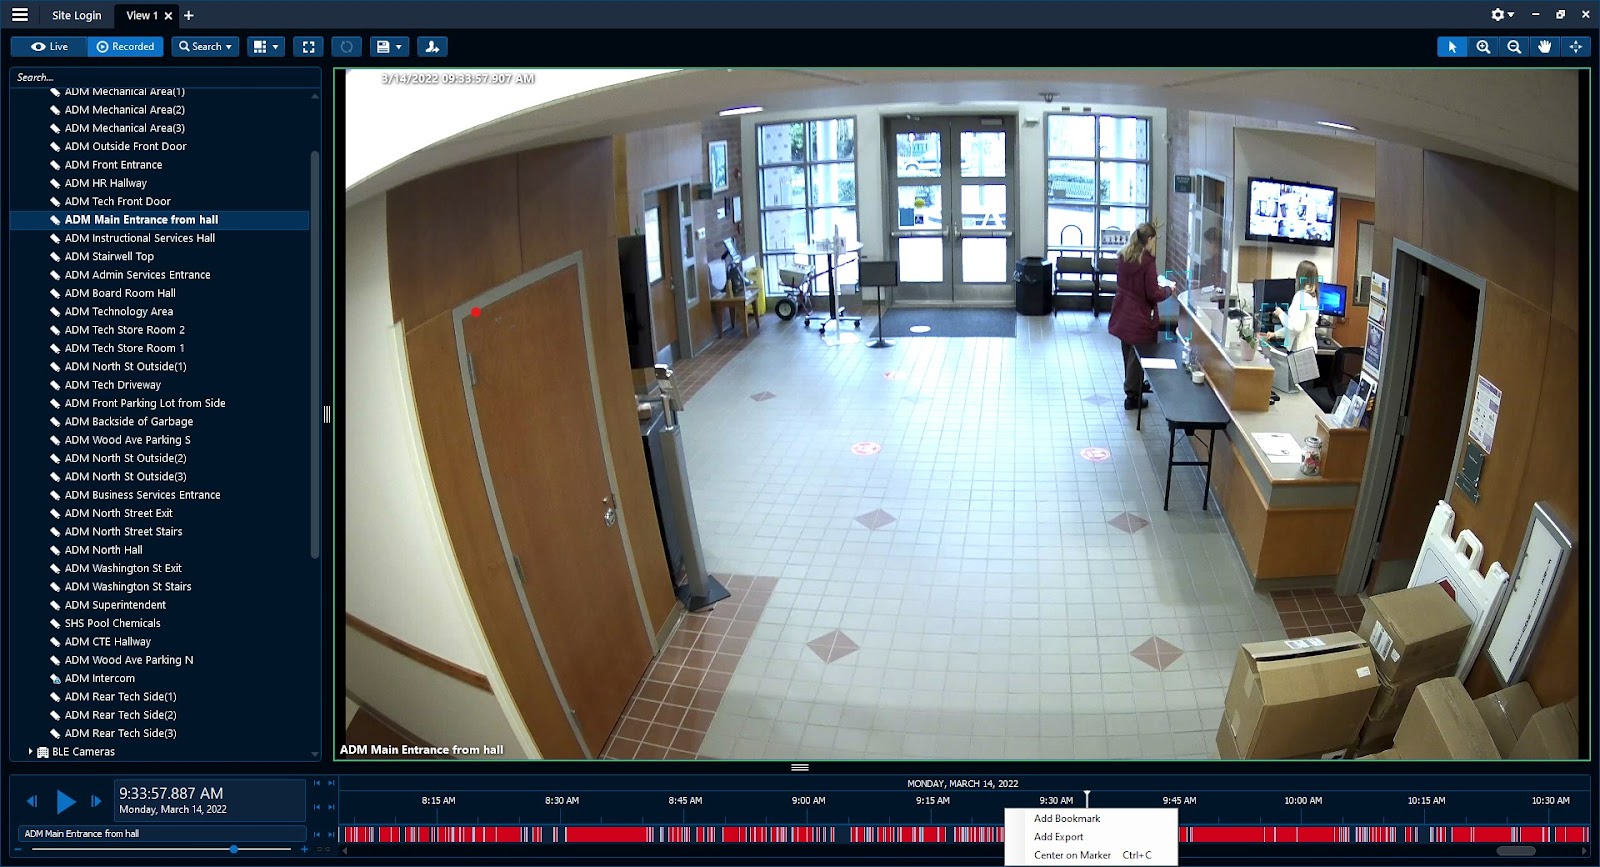
This will bring up a window that will allow you to adjust the start and end times of the video you want to download. You can either type in the time you wish them to start and stop or in the timeline bar at the bottom you will see two white bars which represent the beginning and end which can simply be moved by clicking and dragging it to the desired time.

After setting the time you will press ok which will then move that clip into a new tab at the top titled Export. Click that tab and you will see a timeline in the frame off to the left, you will check the box next to it and at the bottom click on “AVE Options”. We need to change the top option format from the default “Native” to “AVI”. This step is to make sure that computers without the Avigilon software will be able to play the video.
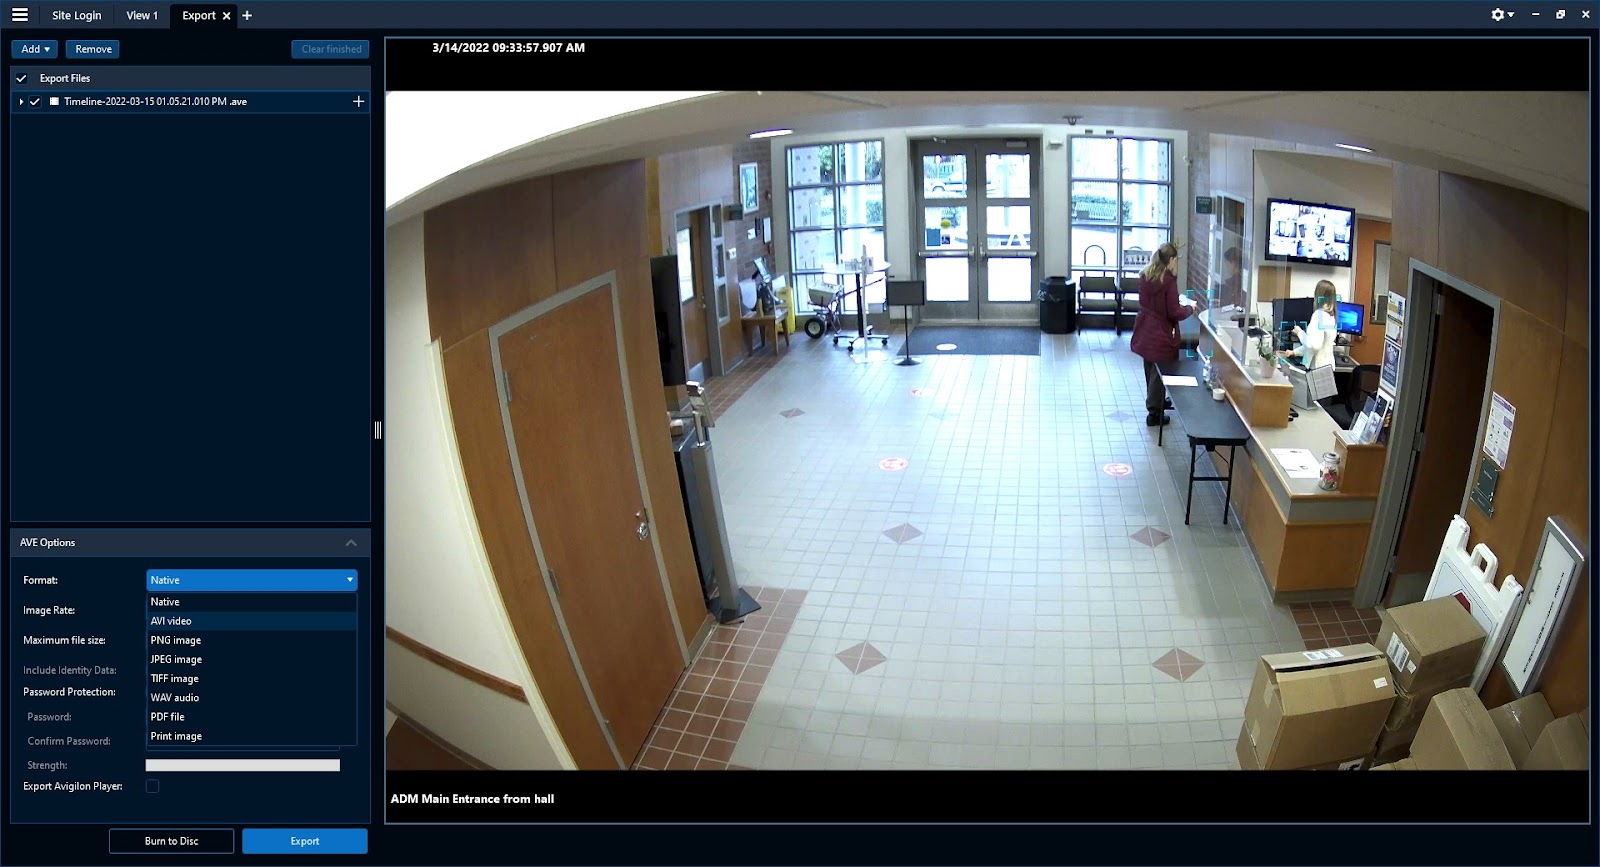
After changing the type you will click export and it will ask you where you would like to save the video. After selecting the location the download will begin and progress information will be displayed on the left column.
One thing to keep in mind is these cameras record at high resolution so the size of file can be pretty big and is almost always too big to be emailed. If it needs to be provided to someone, I have found putting it in a google drive folder and providing the person with a link to download it often works best.