Boardroom
- Board Meeting Checklist
- Board Meeting/Study Session Procedure
- Boardroom Technology User Guide
- Boardroom Cast to All TVs Guide
Board Meeting Checklist
School Board Meeting Procedure
( 7:00 am morning of the meeting)
1.) Remove batteries from board mic's and place them in the charging dock in the storage closet.
(3:00-4:00 pm begin setup)
2.) Setup chairs/tables, public speaker clock,
3.) Setup presentation computer on the side table and connect, power, HMDI, USB-A, and the clicker for slideshow.
4.) Login to presentation PC with ( board_room@sumnersd.org ) Download presentation onto laptop used for presenting to ensure smooth operation.
5.) Launch the compiled presentation and bring the slideshow up on all TV's. Test click, with clicker, through the entire presentation to confirm normal operation and accurate functionality depending on the media presented.
School Board Study Session Procedure
(3:00-4:00 pm begin setup)
1.) Setup chairs/tables, public speaker clock, Meeting Owl, and computers.
2.) Connect PC to meeting Owl and login as board_room@sumnersd.org
3.)
Board Meeting/Study Session Procedure
Board Meeting Equipment Checklist
- Laptop at podium with power cable connected.
- HDMI cable from laptop to wall plate.
- USB type B to USB type A 3.2 from laptop to wall plate.
- Slideshow assembled by combining all presentations into 1 PowerPoint with an intermediary slide separating each presentation.
Boardroom Technology User Guide
The boardroom is equipped with a completely integrated audio, video, voice amplification, and camera system. Each one is individually controlled from either of the two 7-inch touch screen controllers. One controller sits atop the board members bench, and the second is mounted to the wall on the east side of the room beside a TV.
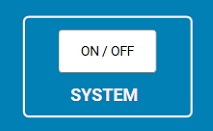
Touch the controller screen to wake it up and press the "ON/OFF" which should turn it green.
Video Display
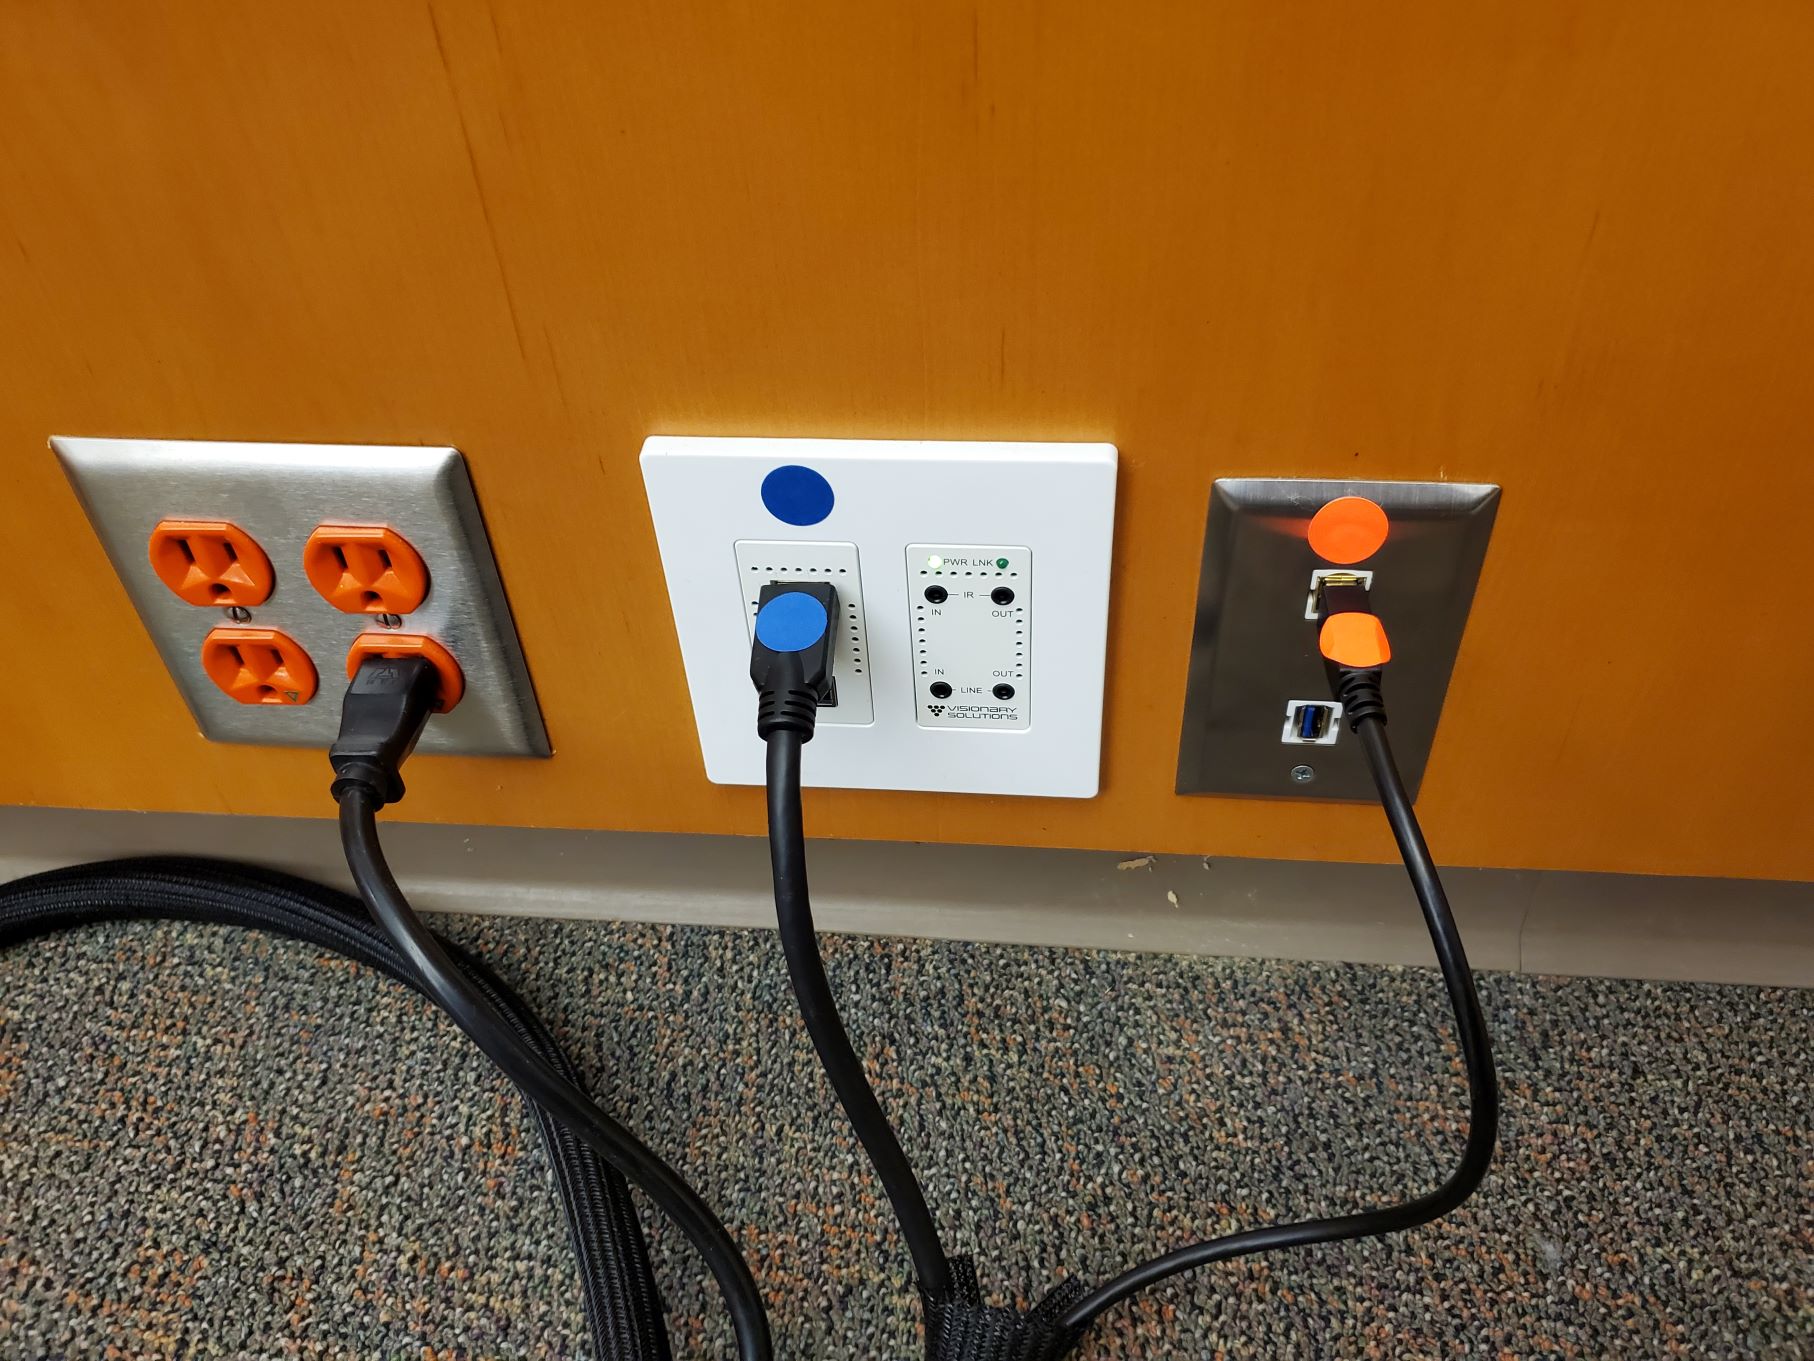
At the podium there are cables plugged into the wall which should not leave. In the event it is unplugged you can simply match the color dots on the cables to the wall plate as seen below. Blue is HDMI and Orange is USB-A
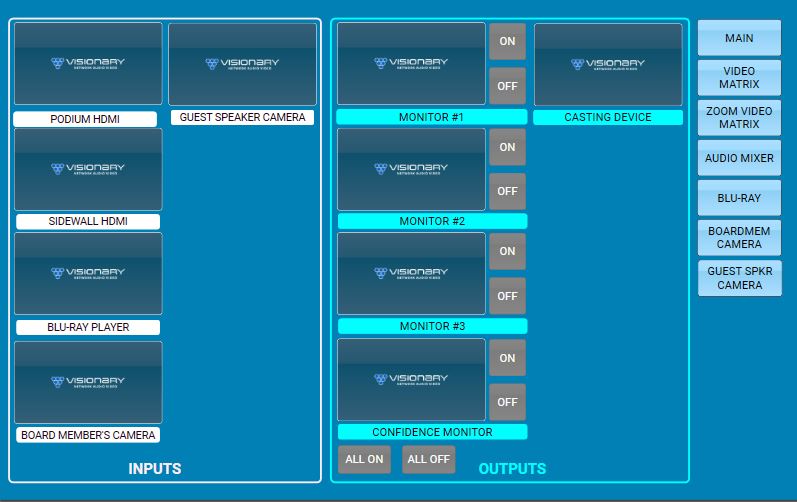
At the bottom of the outputs click "ALL ON" to turn on all the tv's at the same time, or use the individual on button next to the desired screens. (Computer should be plugged using at least HDMI at this point)
If you are connected to the system at the podium and would like your display to be shown on all the screens, you will tap the "Podium HDMI" button on the inputs side, then touch each of the boxes in the outputs that you wish your screen to be shared to.
Audio
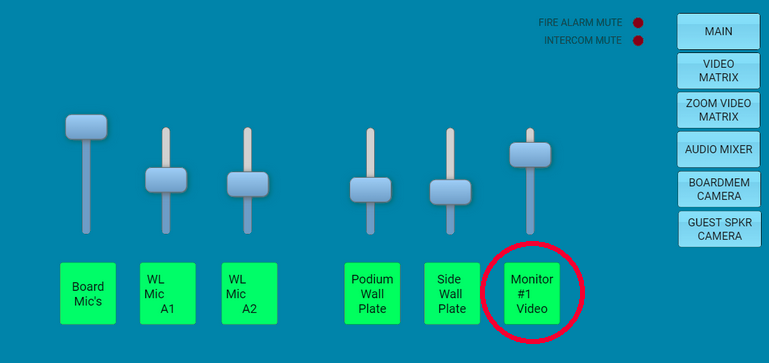
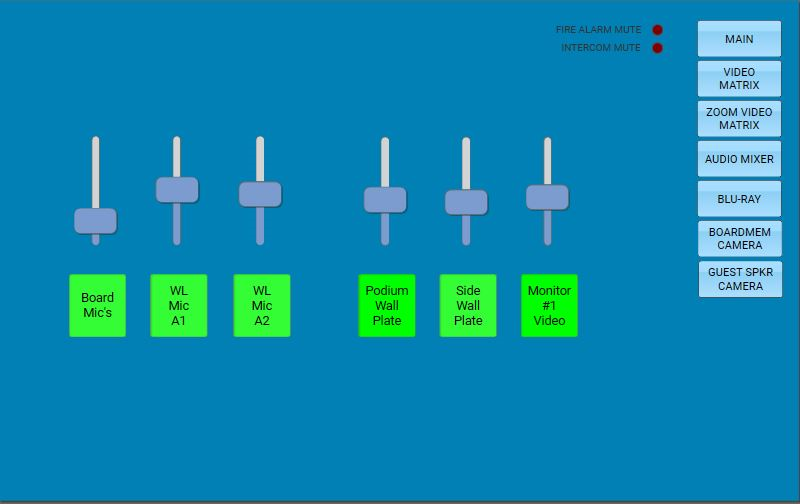
There are 6 different inputs for sound to enter the system, each have their own slider to control the volume level. A screenshot below shows the options.
If you are using the ViewBoards to play a video without connecting a cable to the wall you will need to use "Monitor #1" as it is the only one with an audio out into the system. If plugged into the wall, the audio is received from the HDMI cable connected into the wall plate.
Zoom Cameras
To use the wall mounted cameras you will need to first power on the camera's using their dedicated controller page on the touchscreen.
Click the desired camera and press the on button in the top left. It will power on and swivel to a default location, often not in the correct direction. To bring the camera to the normal used position press the M1 RECALL button shown below.

Boardroom Cast to All TVs Guide
Wireless casting to all TV’s
(All district-issued devices have V-Cast sender pre-installed if compatible)
- Locate the Video Matrix (the touchscreen control panel near the podium). Select ‘VIDEO MATRIX’.
- Power on all TV’s with the button at the bottom of the Video Matrix page.
- Walk up to TV #1 (the left TV on the north wall behind the board member chairs) and then click and drag with your finger from the edge of the screen inward and press the home button (shaped like a house).
- Open the V-Cast app on TV #1 and enter the code provided on your device to begin casting your screen.
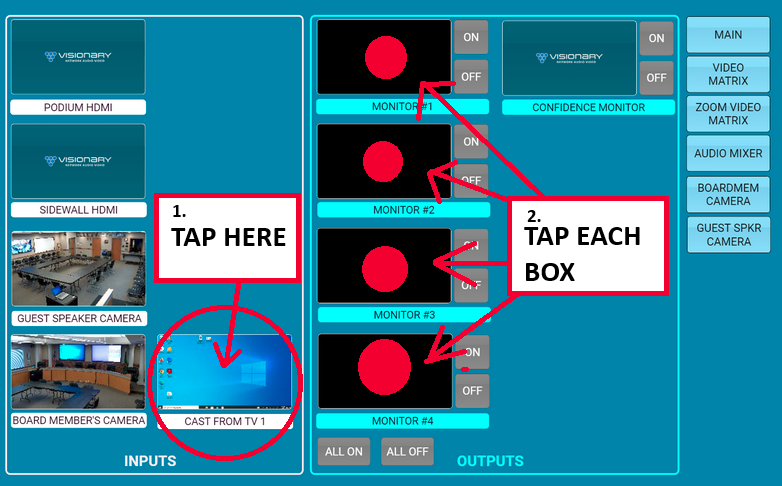
- Once your screen is casting, return to the touch screen control panel (Video Matrix). It will show your screen in the ‘CAST FROM TV 1’ shown in the image below.
- Tap the input box labeled ‘CAST FROM TV 1’ and tap each screen (MONITOR #1-4) on the right-hand side of the OUTPUTS menu to send your screen to all TV’s in the boardroom.
- The volume output will come through the ceiling speakers and can be adjusted on your local device or by using the slider labeled ‘Monitor #1 Video’ as seen below. (make sure your computer is not muted)