RapidIdentity
- How to Claim Your Account
- How To Setup 2FA
- How To Reset Your Password
- How to Print Login QR Badges For Students
- How to Manage Student Accounts
- New RapidIdentity Dashboard 2024
How to Claim Your Account
Overview of Account Claiming
Claiming a RapidIdentity account is a process which involves the following:
- Proving ownership of the account via a claim code
- Agreeing to the SBLSD's Acceptable Use Policy (AUP)
- Setting a new password
- (Optionally) Setting challenge questions which are used in the event you forget your password.
Claim Codes
A claim code is a token which the owner of the account has knowledge of and is used to prove that the person accessing an account is the owner of it. For SBLSD accounts, the claim code is based on your employee ID or student ID.
Staff Claim Codes
-
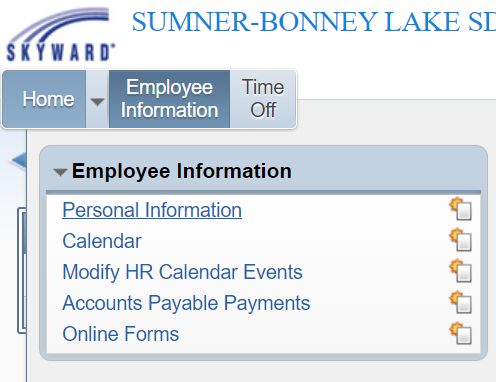
Login to Skyward and go to Employee Access
-
Click on Employee Information > Personal Information

-
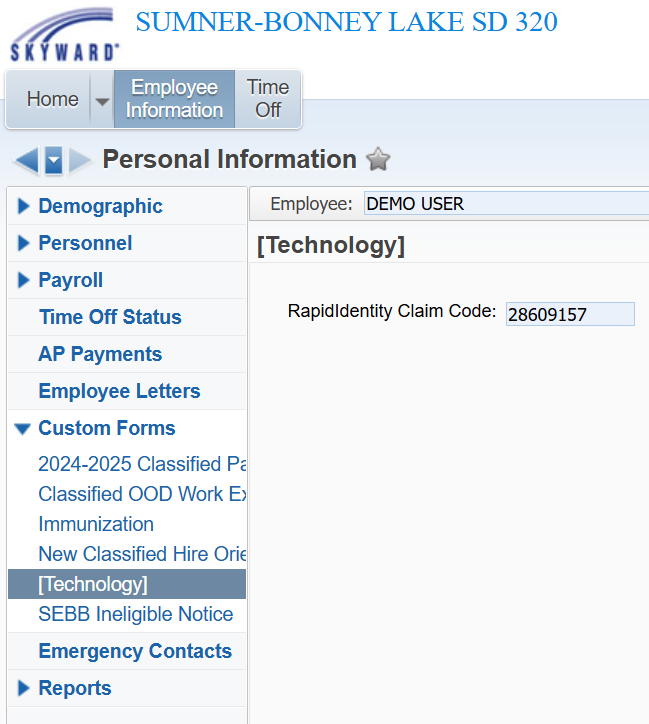
Click on Custom Forms > [Technology]. Your RapidIdentity claim code is displayed in the form.

Student Claim Codes
For students, the claim code is your student ID with leading zeroes if your ID is under 8 characters long. For example:
| Student ID | Claim Code |
| 0123456 | 00123456 |
| 1234567 | 01234567 |
New Password Requirements
| Students |
Minimum Length
|
| Staff |
Minimum Length
At least 3 of the following:
|
Claiming Your Account
Windows
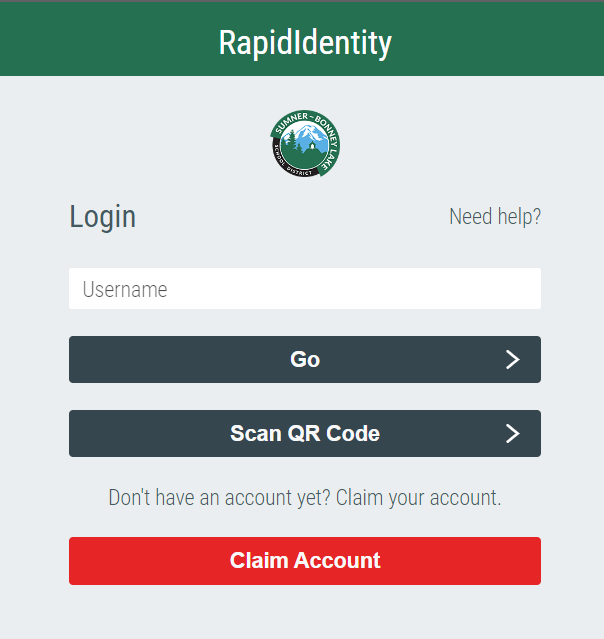
1. Open the Chrome browser
2. Navigate to https://sblsd.us001-rapididentity.com/
3. At the RapidIdentity login screen, click the Claim Account button.
|
|
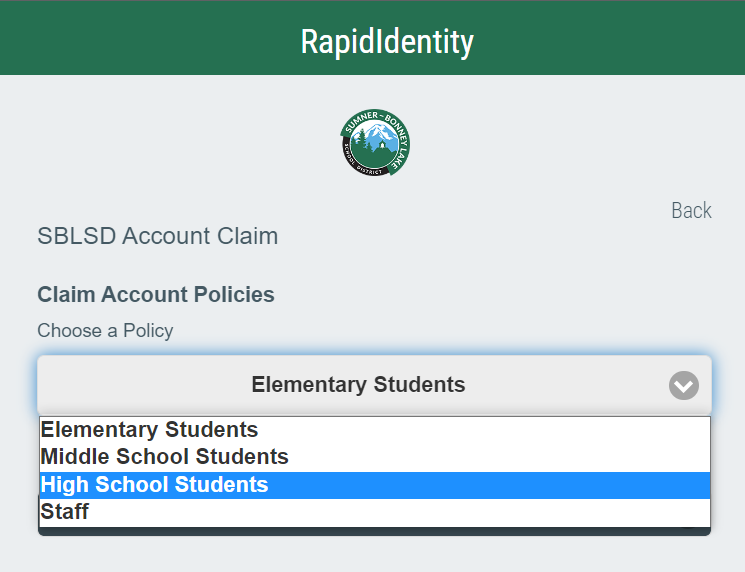
4. Click on the dropdown list and select the claim policy that applies to you, then click the Next button
|
|
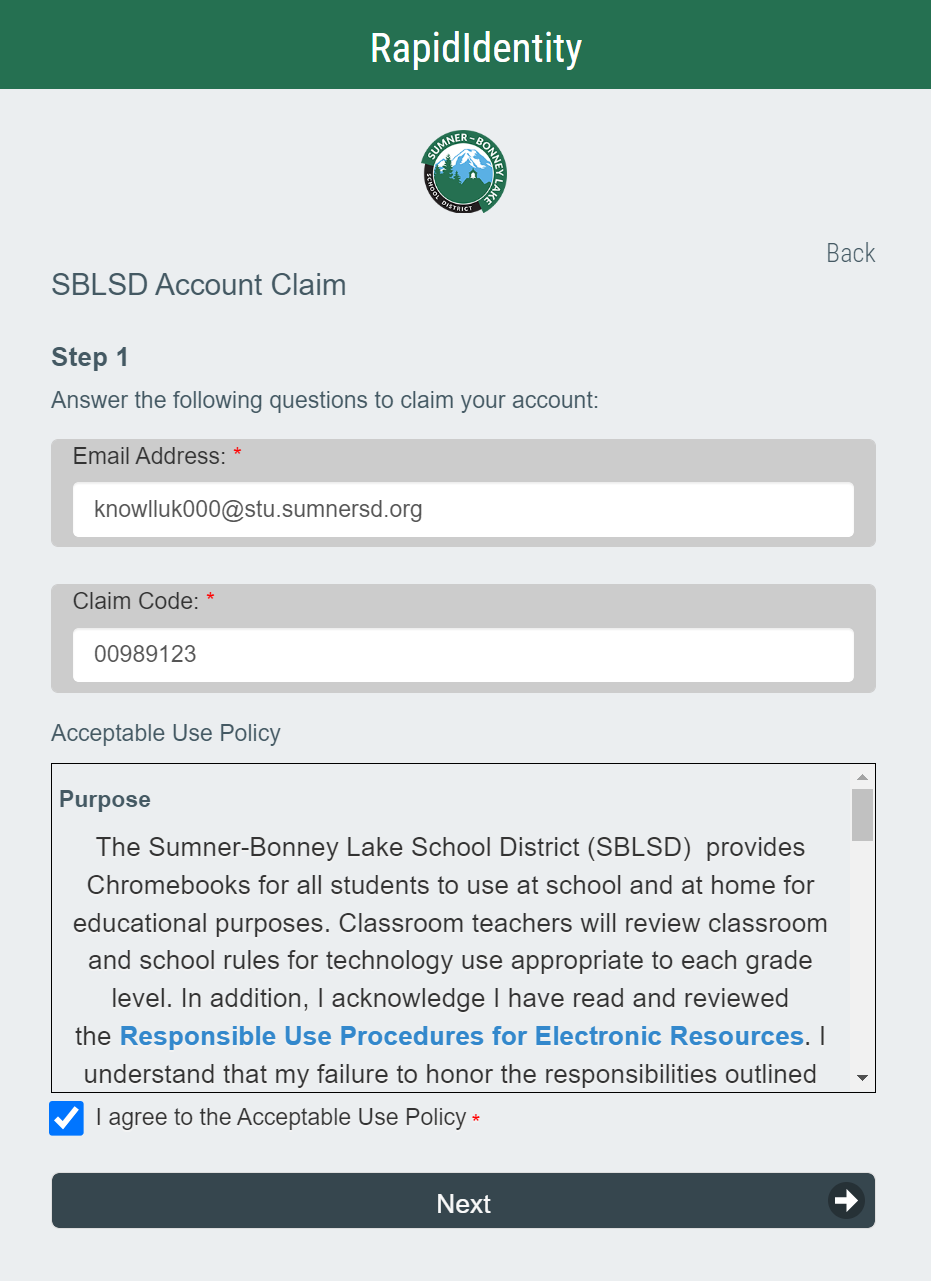
5. On the following page, enter your email address and claim code. Agree to the Acceptable Use Policy, then click the Next button
|
|
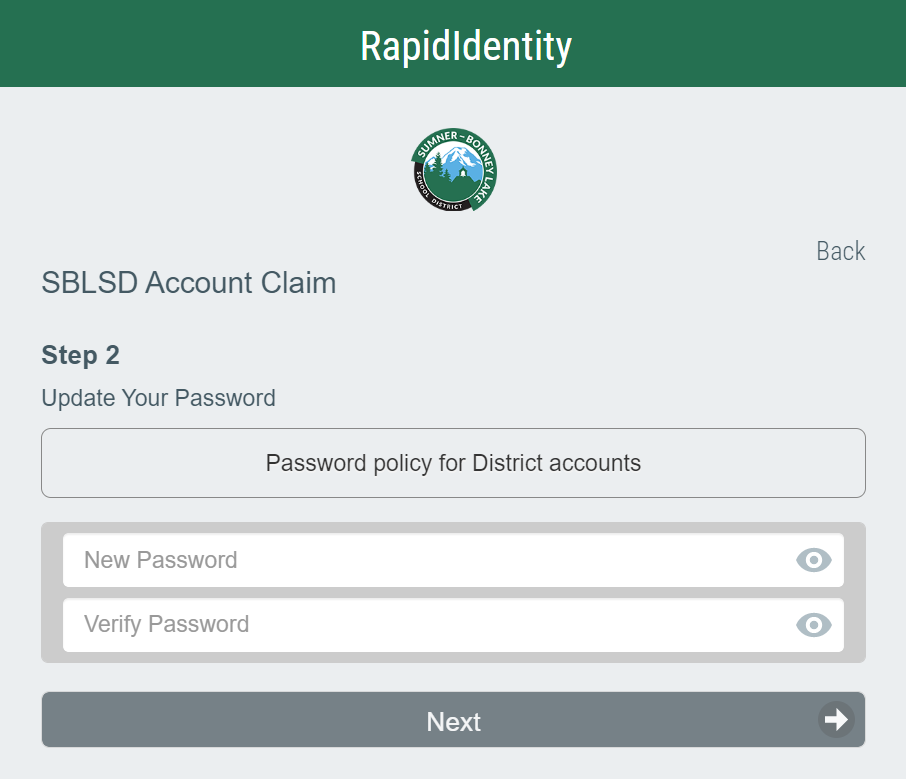
6. Set your new password (refer to the New Password Requirements section for the minimum requirements), then click the Next button. This will be the password you use to log in to RapidIdentity, Google, and SBLSD Windows devices going forward.
|
|
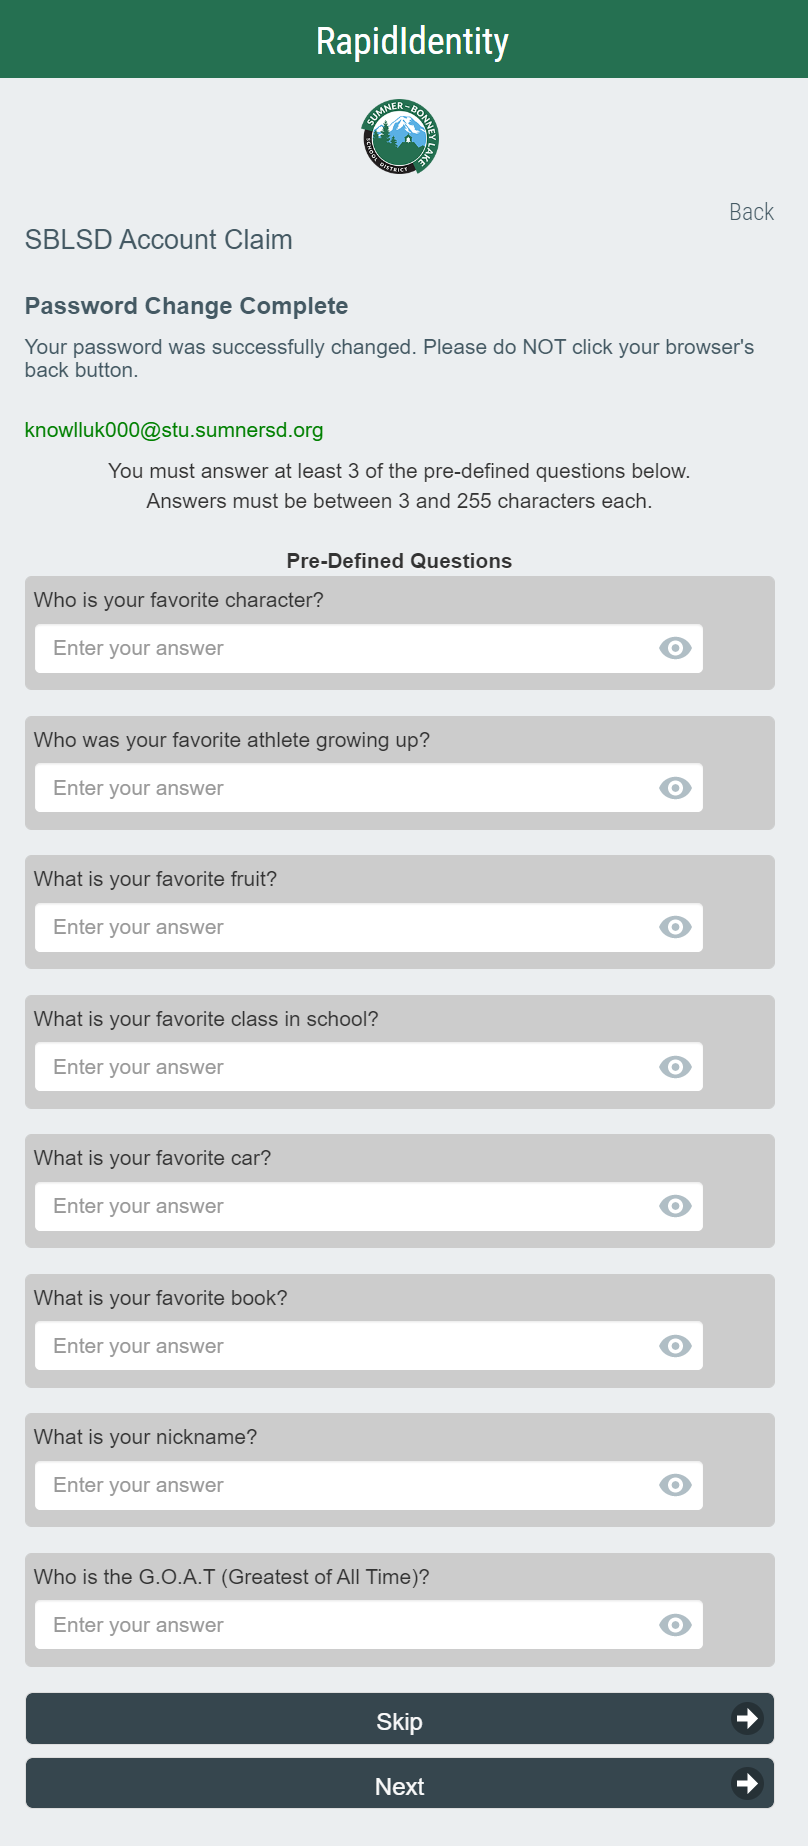
7. (Optional, but recommended) Set answers to at least 3 challenge questions, then click the Next button. If you would prefer to set challenge questions later, click the Skip button.
|
|
Chromebook
1. On the ChromeOS login screen, click the Add Person button located near the bottom left of the screen.
2. If prompted by a white message box, click Next
3. Proceed from step 3 of the instructions in the Windows section.
How To Setup 2FA
These instructions have been migrated to the Technology Services department's new documentation platform. Please refer to this link for up-to-date instructions and information regarding MFA. The content on this page is no longer maintained and will be removed in the near future.
Two-Factor Authentication Methods
The Technology Services department officially recommends the TOTP method for staff - we consider it the most balanced option in terms of security and convenience
| Name | Description | Requirements |
| SMS | A temporary code is delivered to your phone via text message |
|
| ⭐ TOTP (time-based one-time password) | A temporary code which is continuously generated by an app on your phone |
|
| WebAuthn | A USB security key which is plugged in to your device |
|
How to Edit Your RapidIdentity Profile
|
1. Log in to RapidIdentity 2. Click on your name in the top-right corner 3. Select Profile Settings from the dropdown 4. Click the Edit button 5. Make any changes according to the instructions for your preferred authentication method below 6. Click the Save button |
 |
Authentication Method Setup Instructions
TOTP
TOTP Instructions
1. Select TOTP from the Authentication Method dropdown, then click the Save button
2. Log out of RapidIdentity, then log back in
3. After entering your credentials, you will receive the following prompt
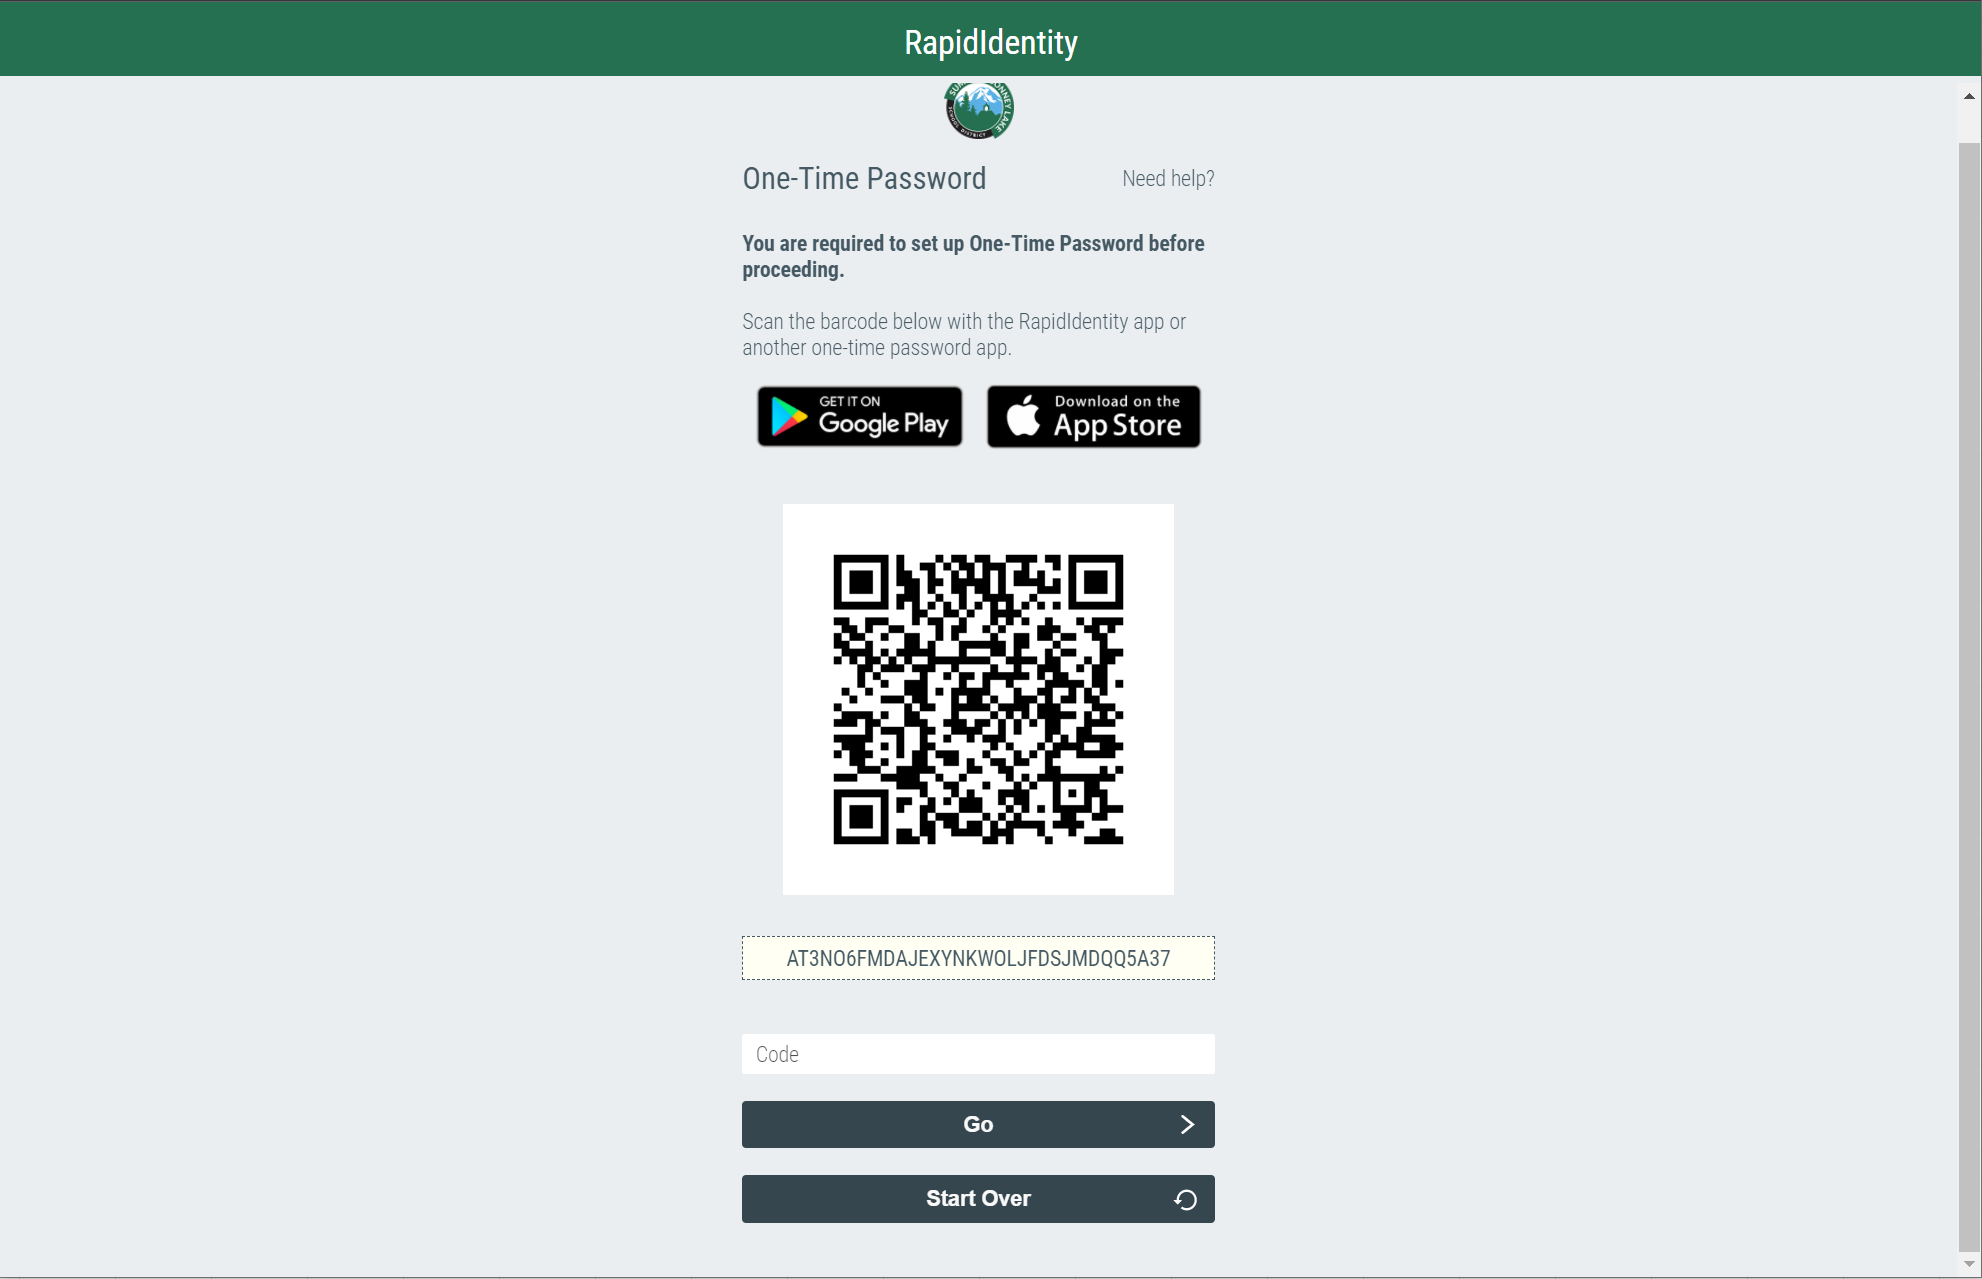
4. Open the Google Authenticator app on your phone. Select the Scan a QR code option, then scan the QR code displayed by RapidIdentity
5. Google Authenticator will add the account and begin generating one time codes

6. In RapidIdentity, type in the code with is currently shown by Google Authenticator, then click the Go button
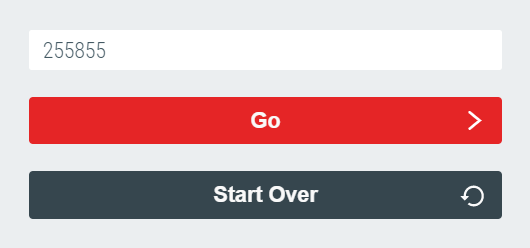
7. Success! Now you will be prompted to enter a code from Google Authenticator when you log in to RapidIdentity
SMS
SMS Instructions
1. Update the Mobile Number field near the top of your profile. Ensure it is an up-to-date number where you will be receiving your one-time code.
2. Select SMS from the Authentication Method dropdown, then click the Save button

3. Log out of RapidIdentity, then log back in
4 . After entering your credentials, you will receive the prompt below

5. Open your cell phone and view your text messages. You should receive a message immediately after seeing the screen above. Enter the code provided into the SMS Authentication box shown previously. This is a one-time access code that can not be reused. You will receive a new code every time you log in.

6. Success! You will now be prompted for an access code when you log in to RapidIdentity
WebAuthn
WebAuthn Windows Instructions
1. Select WebAuthn from the Authentication Method dropdown, then click the Save button
2. Log out of RapidIdentity, then log back in
3. After entering your credentials you should receive the following prompt
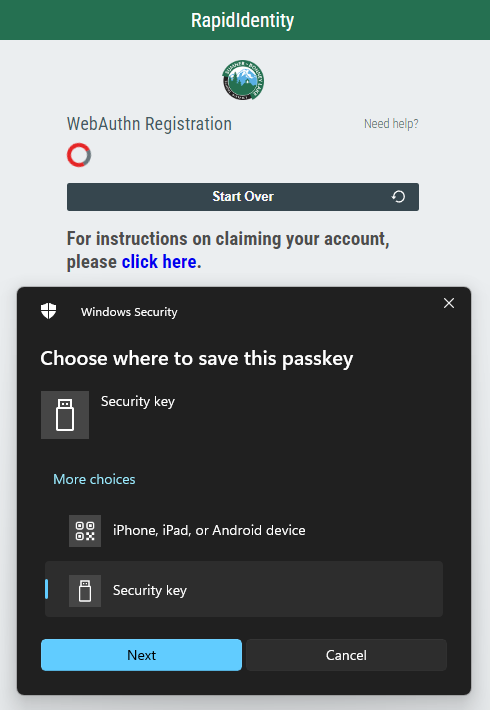
4. Plug your YubiKey in to a free USB port on your device
|
5. Select the Security Key option on the Choose where to save this passkey prompt 6. Click the Next button
7. Click the OK button on the Security key setup prompt
8. Touch the button on your YubiKey
9. Click the OK button on the Passkey saved prompt
10. Success! Now you will be prompted to insert and tap your YubiKey when you log in to RapidIdentity |
 |
How To Reset Your Password
If You Are Able To Login
1. Login to RapidIdentity
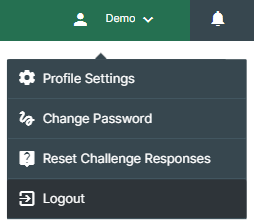
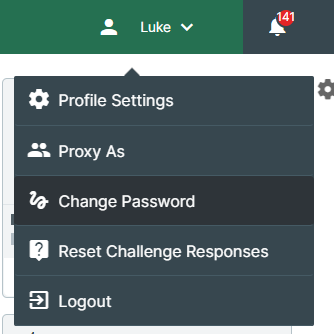
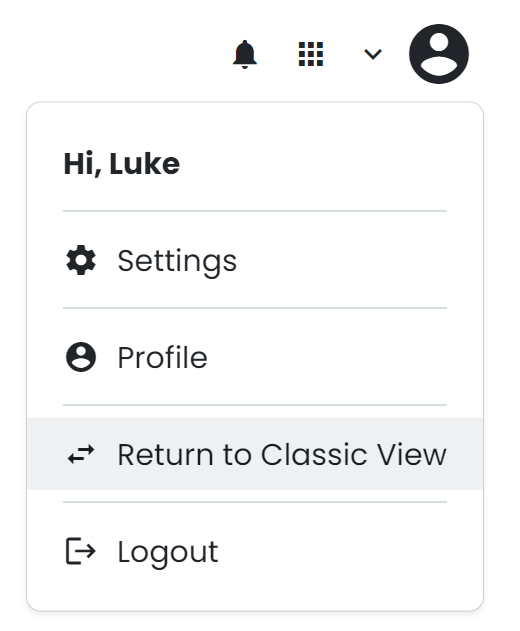
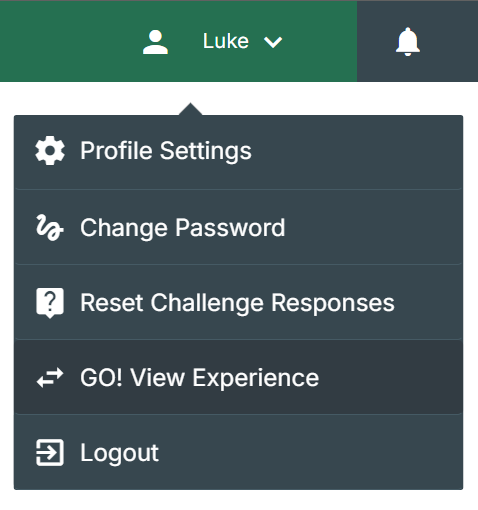
2. In the top-right corner, click on your name. A drop-down menu will appear.
3. Click the Change Password button in the drop-down menu
|
|
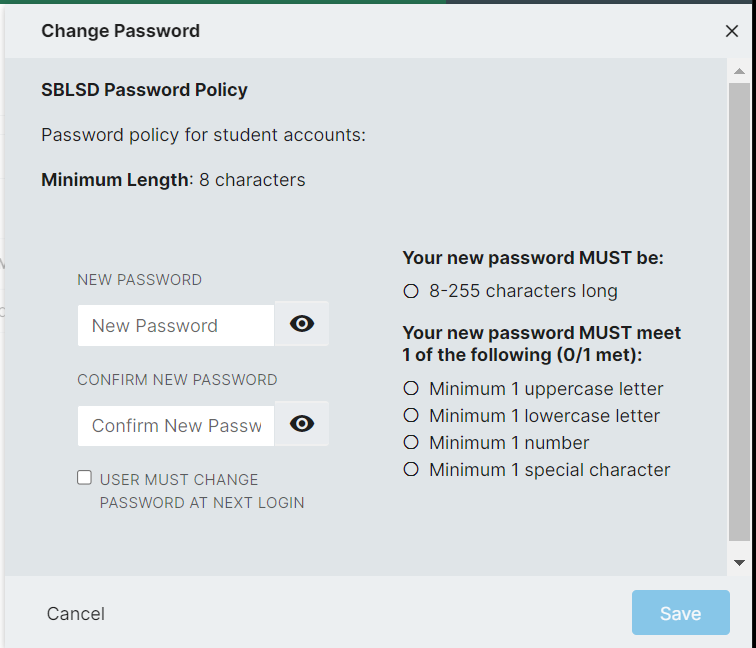
4. Follow the prompt to set a new password
|
|
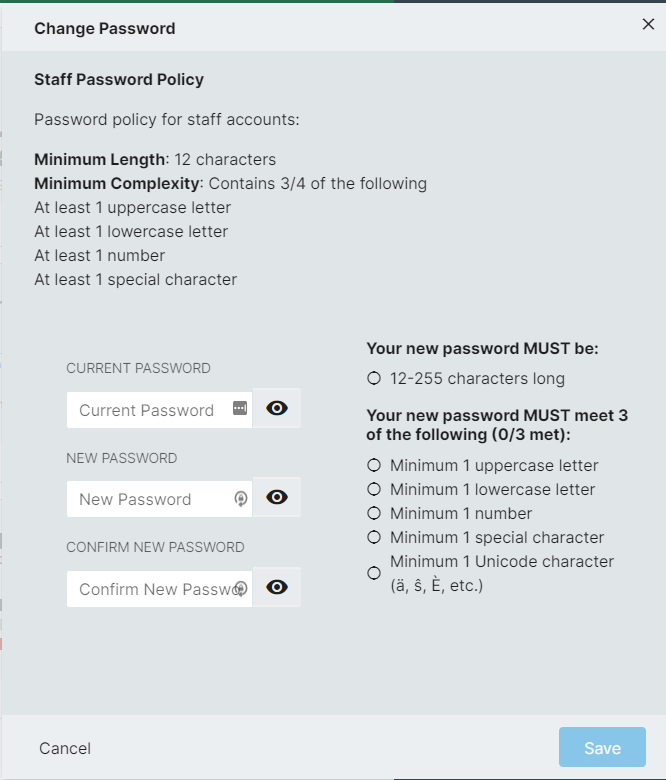
5. Click the Save button
If You Are Unable To Login
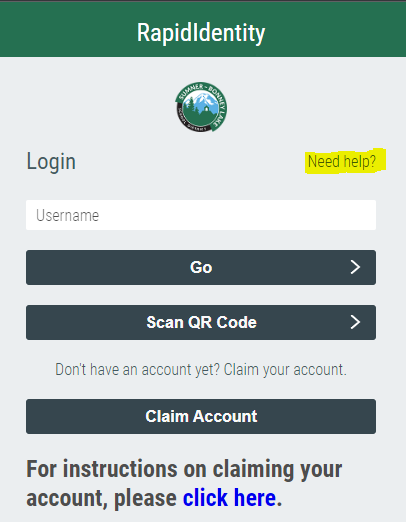
1. Go to the RapidIdentity login page
2. Click the Need help? link above the username field
|
|
3. Click the Forgot My Password button
|
|
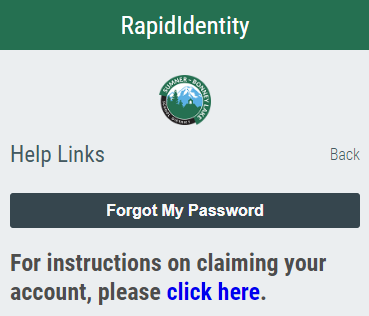
4. Follow the prompt to set your new password
How to Print Login QR Badges For Students
These instructions have been migrated to the Technology Services department's new documentation platform. Please refer to this link for up-to-date instructions and information regarding printing login QR badges. The content on this page is no longer maintained and will be removed in the near future.
Requirements
- One of the following RapidIdentity roles:
District QR Badge Manager,Building Account Manager
Instructions
1. Log in to RapidIdentity
|
|
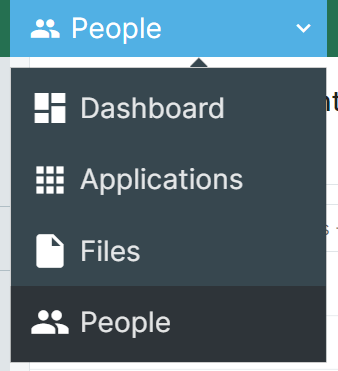
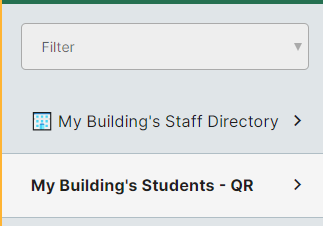
3. Select one of the following profile views depending on your access level: All Students - QR or My Building's Students
|
|
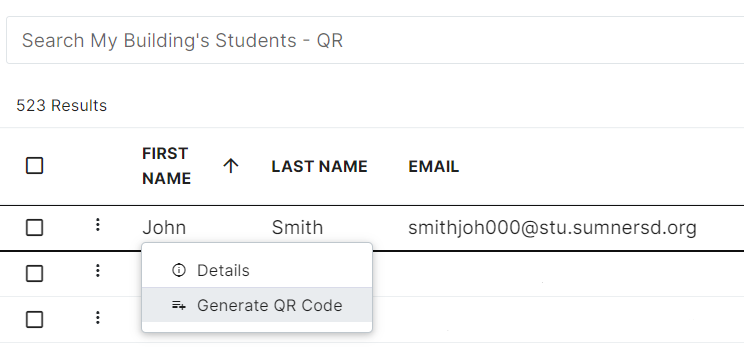
4. Search for the student you want to print a QR badge for. You can search by name, username, email, grade level, or student ID.
Wildcard searches are supported using the * character. For example:
- To search for students who have the word "Tim" in their name, search for *tim*
- To search for students whose name begins with "Tim", search for tim*
- To search for students whose name ends with "othy", search for *othy
All other searches must be an exact match on a field. Searching for tim will not return any students named "Timothy".
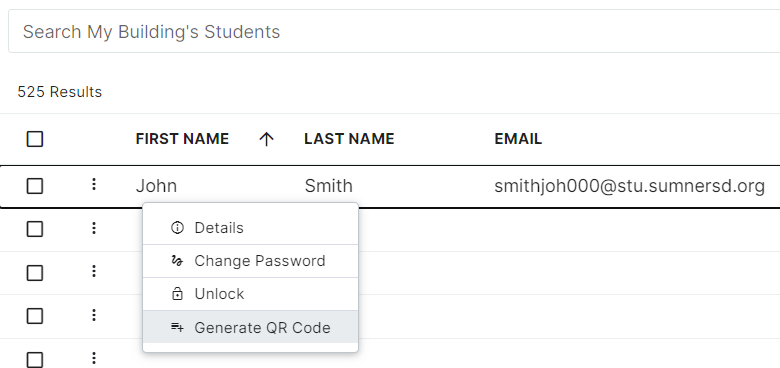
5. Right click on the student result and click the Generate QR Code option from the context menu
|
|
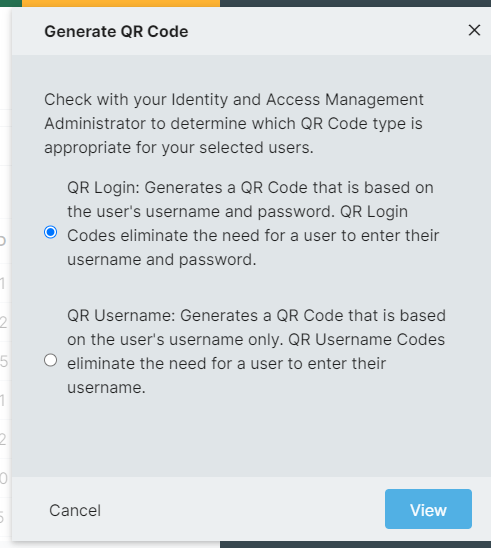
6. Select the QR Login option, then click the View button
|
|
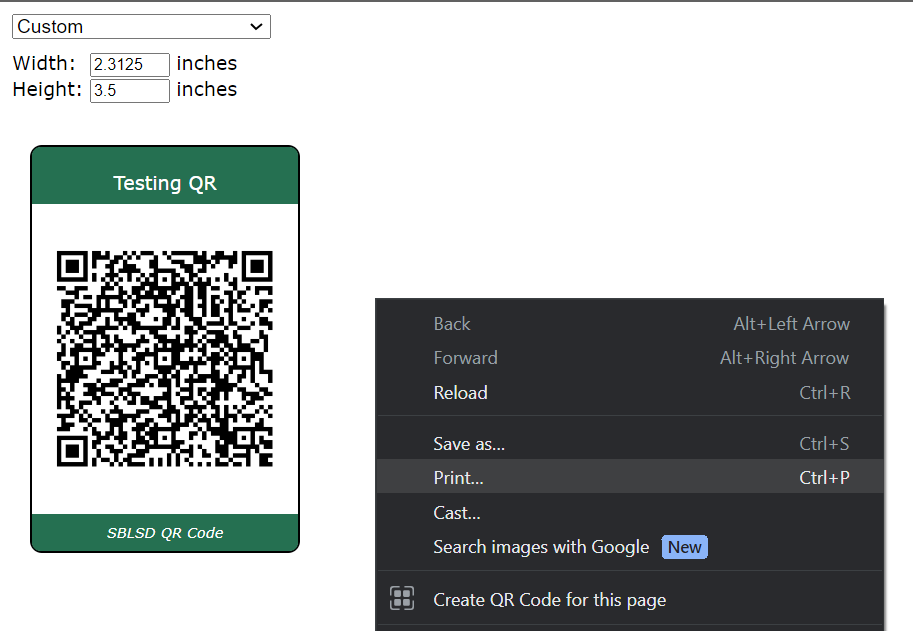
7. RapidIdentity will open a new page with the generated QR code. From here you can adjust the layout of the QR badge (if needed) and print it.
|
|
How to Manage Student Accounts
These instructions have been migrated to the Technology Services department's new documentation platform. Please refer to this link for up-to-date instructions and information regarding student account management. The content on this page is no longer maintained and will be removed in the near future.
Requirements
- One of the following RapidIdentity roles:
District QR Badge Manager,Building Account Manager - OR be the primary teacher of a class with active student enrollments
Searching For Student Accounts
1. Log in to RapidIdentity
|
|
3. Select one of the following profile views depending on your access level
| Profile View Name | Description | Requirement |
All Students - QR |
This view is exclusively used at the district level for managing QR badges. Returns all students. |
District QR Badge Manager role. |
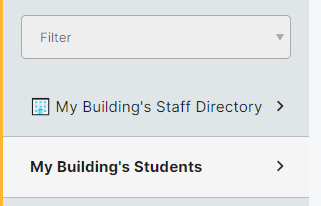
🏫 My Building's Students |
This view is intended for use by building administrators and librarians. It will show students who share a common location assignment with you. |
Building Account Manager role. |
🎓 My Students |
This view is intended for use by teachers. It will show students who are enrolled in your class(es). |
|
|
|
4. Search for a student. You can search by name, username, email, grade level, primary location, or student ID.
|
Wildcard searches are supported using the
All other searches must be an exact match on a field. Searching for |
Viewing Account Details
1. Right click on a student result and click the View Details option from the context menu
The information available for student accounts includes their name, home phone number, email, username, account status flags (disabled, locked, claimed), grade, locations, teachers, classes, and more.
|
|
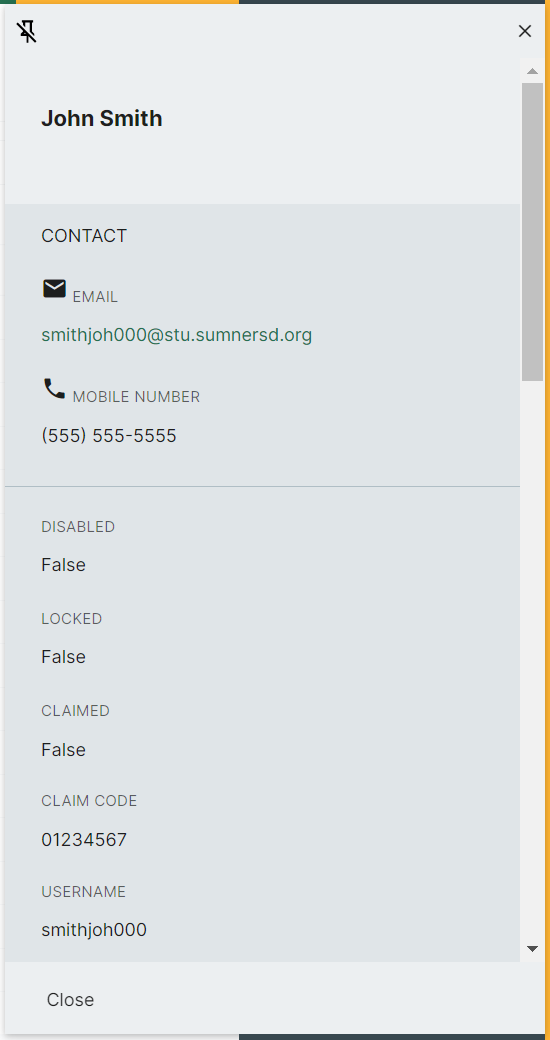
2. When you are finished, click the Close button in the bottom-left of the details pane. Optionally, you can keep the details pane open while browsing results by clicking the pushpin icon on the top-left of the pane.
Generating QR Badges
You can generate QR codes in bulk by selecting multiple results. This will format the page in a way that makes it easier to cut out the badges.
1. Right click on a student result and click the Generate QR Code option from the context menu
|
|
2. Select the QR Login option, then click the View button
|
|

3. RapidIdentity will open a new page with the generated QR code. From here you can adjust the layout of the QR badge (if needed) and print it.
|
|
Unlocking Accounts
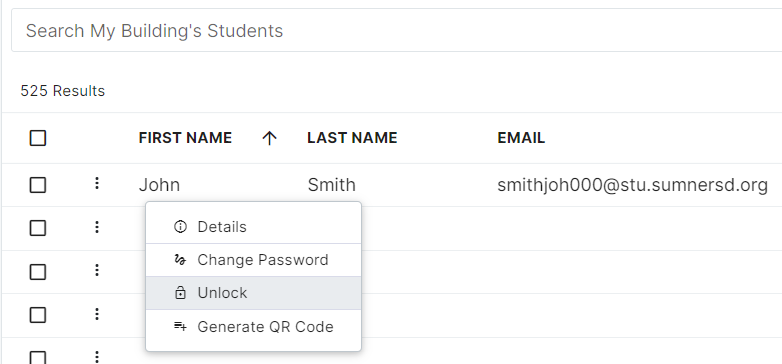
1. Right click on a student result and click the Unlock option from the context menu
|
|
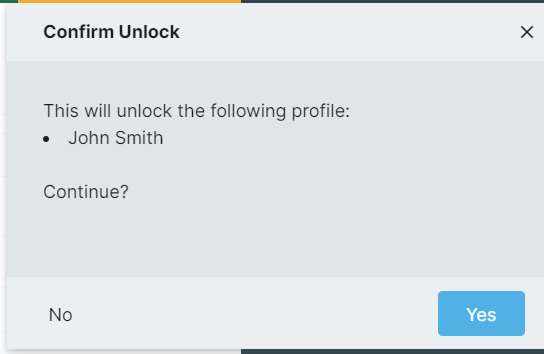
2. When prompted, click the Yes button
|
|
Changing Passwords
If you are changing the password for a student who logs in to RapidIdentity with a QR badge, they will require a new QR code to be generated after their password is changed
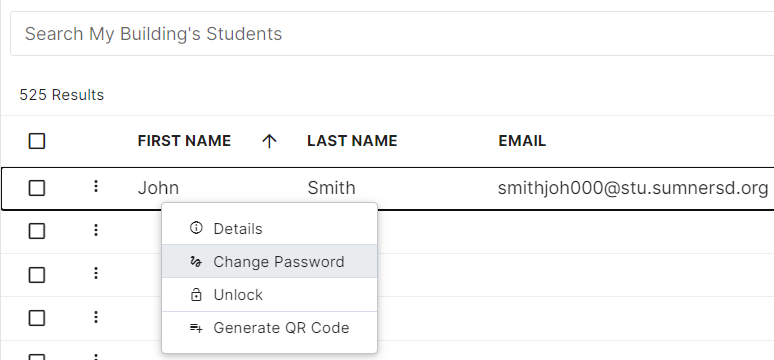
1. Right click on a student result and click the Change Password option from the context menu
|
|
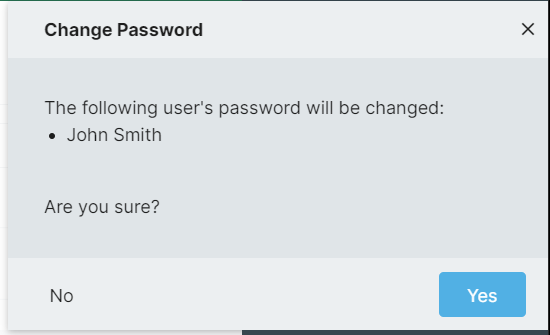
2. Click the Yes button
|
|
3. Enter a new password that complies with the minimum requirements for the account's password policy. If the account belongs to a secondary student (6-12), we recommend selecting the User Must Change Password At Next Login option so that the student may set their own password after re-gaining access to their account.
|
|
4. Click the Save button
It may take several seconds for the password change to complete depending on the current system load
New RapidIdentity Dashboard 2024

Settings
|
|
|

Custom Apps

Switching Between the New & Old Dashboards
|
Switch to the old dashboard |
Switch to the new dashboard |
|
|
|
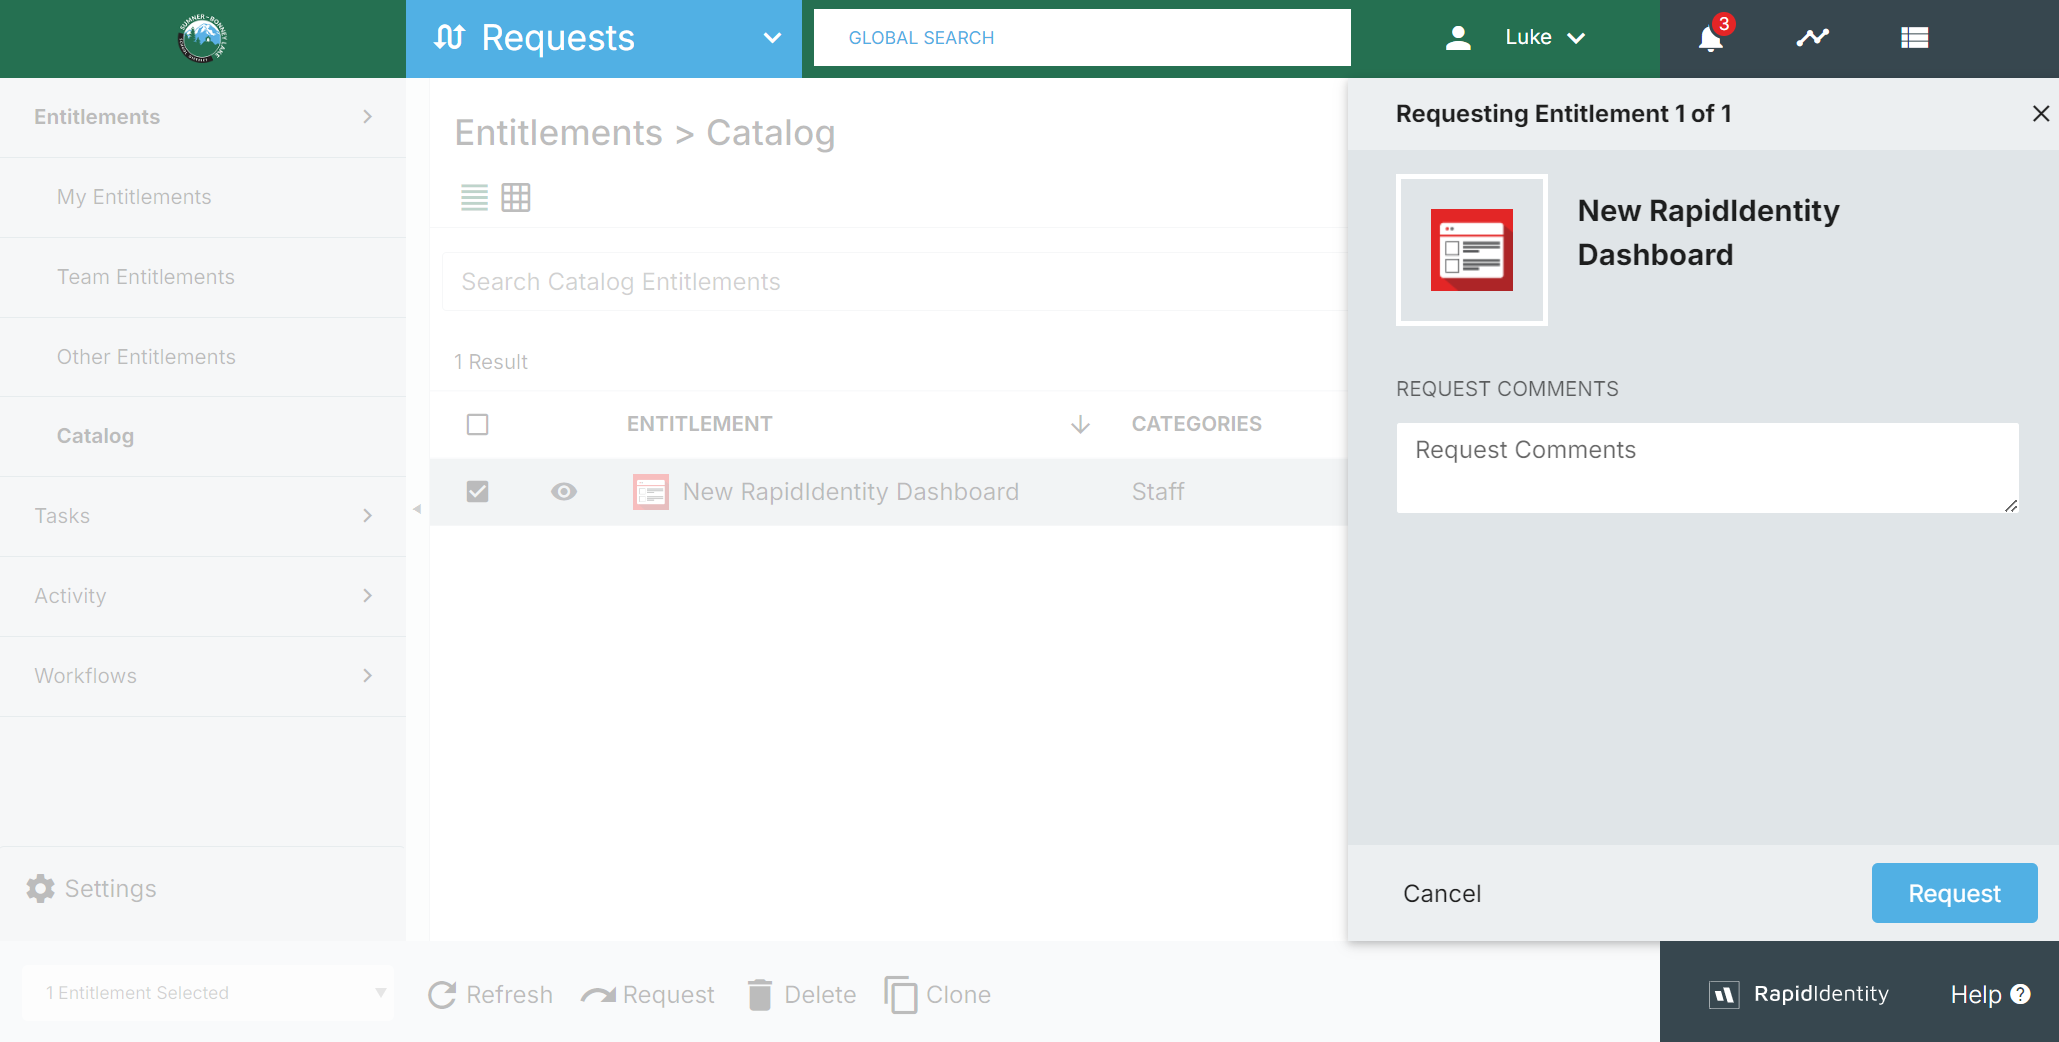
Get Early Access to The New Dashboard
- Open the RapidIdentity Requests module
- Select Entitlements > Catalog from the menu on the left
- Locate the New RapidIdentity Dashboard entitlement, then click the Request button which will open a popup
- Click the Request button in the popup

- Wait a few moments for the request to automatically be fulfilled, then navigate to sblsd.us001-rapididentity.com.