How to Manage Student Accounts
These instructions have been migrated to the Technology Services department's new documentation platform. Please refer to this link for up-to-date instructions and information regarding student account management. The content on this page is no longer maintained and will be removed in the near future.
Requirements
- One of the following RapidIdentity roles:
District QR Badge Manager,Building Account Manager - OR be the primary teacher of a class with active student enrollments
Searching For Student Accounts
1. Log in to RapidIdentity
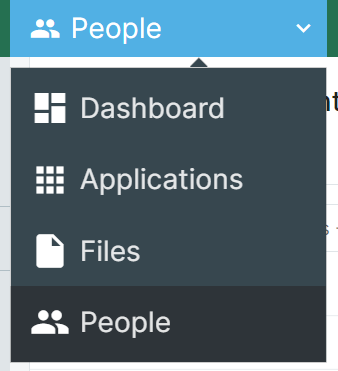
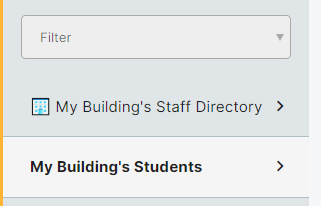
3. Select one of the following profile views depending on your access level
| Profile View Name | Description | Requirement |
All Students - QR |
This view is exclusively used at the district level for managing QR badges. Returns all students. |
District QR Badge Manager role. |
🏫 My Building's Students |
This view is intended for use by building administrators and librarians. It will show students who share a common location assignment with you. |
Building Account Manager role. |
🎓 My Students |
This view is intended for use by teachers. It will show students who are enrolled in your class(es). |
|
4. Search for a student. You can search by name, username, email, grade level, primary location, or student ID.
|
Wildcard searches are supported using the
All other searches must be an exact match on a field. Searching for |
Viewing Account Details
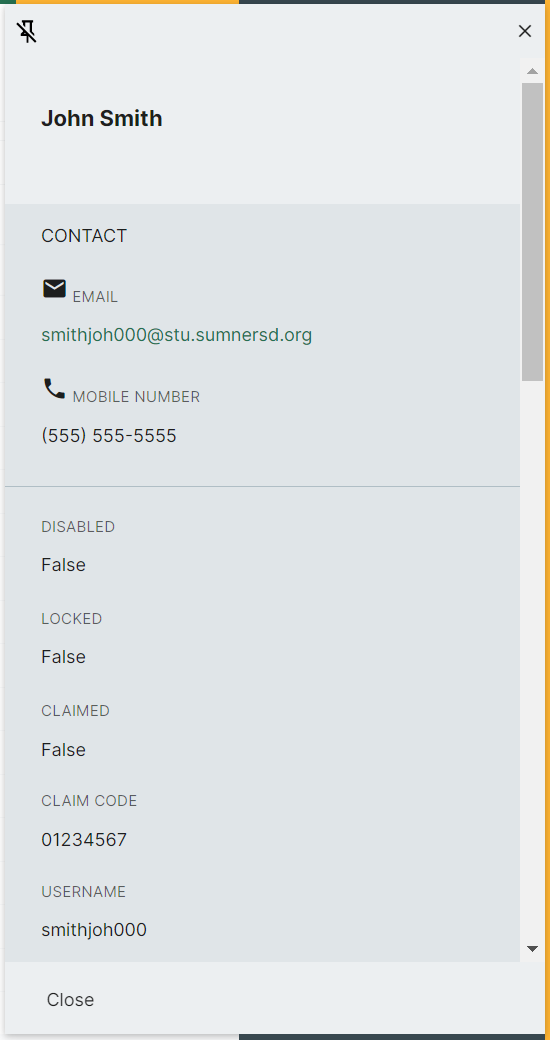
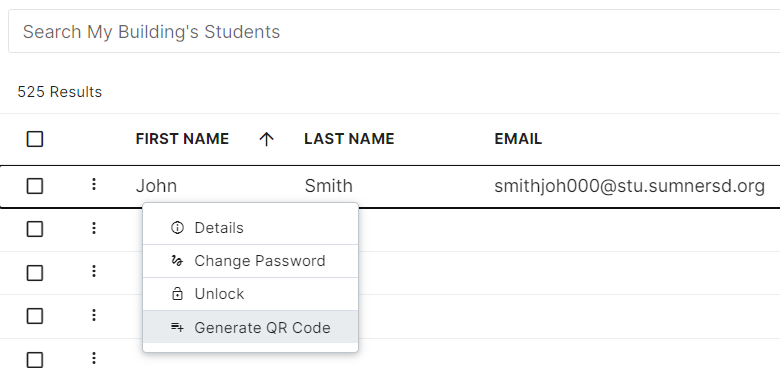
1. Right click on a student result and click the View Details option from the context menu
The information available for student accounts includes their name, home phone number, email, username, account status flags (disabled, locked, claimed), grade, locations, teachers, classes, and more.
2. When you are finished, click the Close button in the bottom-left of the details pane. Optionally, you can keep the details pane open while browsing results by clicking the pushpin icon on the top-left of the pane.
Generating QR Badges
You can generate QR codes in bulk by selecting multiple results. This will format the page in a way that makes it easier to cut out the badges.
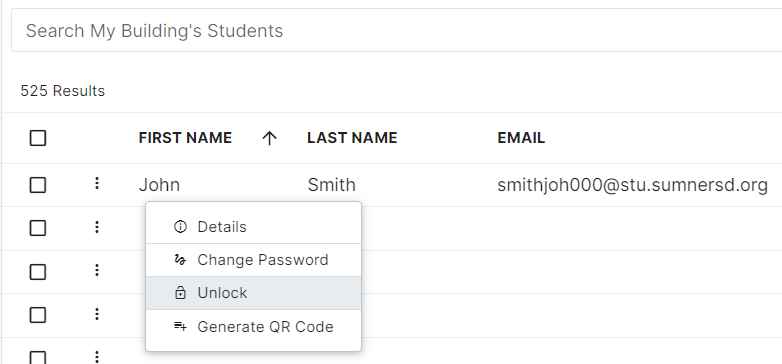
1. Right click on a student result and click the Generate QR Code option from the context menu
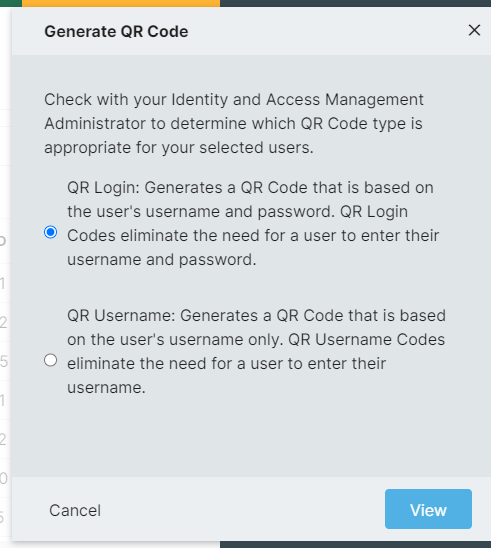
2. Select the QR Login option, then click the View button
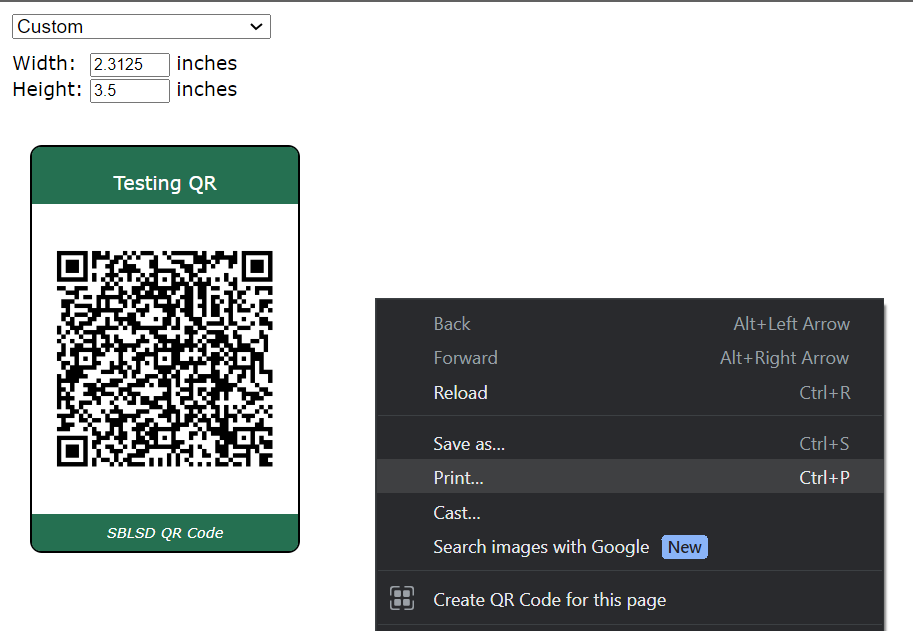
3. RapidIdentity will open a new page with the generated QR code. From here you can adjust the layout of the QR badge (if needed) and print it.
Unlocking Accounts
1. Right click on a student result and click the Unlock option from the context menu
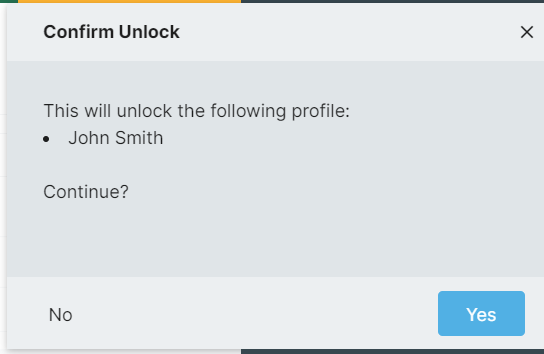
2. When prompted, click the Yes button
Changing Passwords
If you are changing the password for a student who logs in to RapidIdentity with a QR badge, they will require a new QR code to be generated after their password is changed
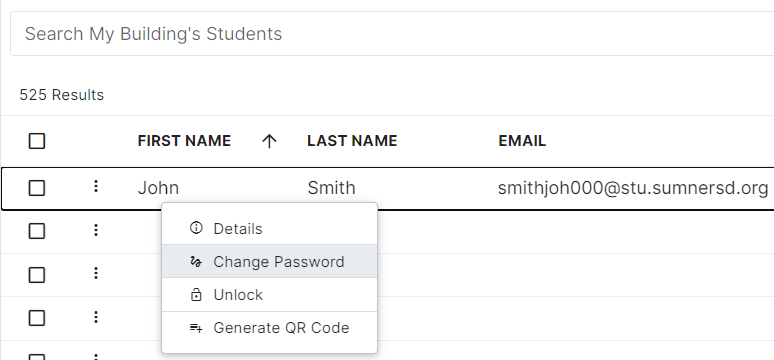
1. Right click on a student result and click the Change Password option from the context menu
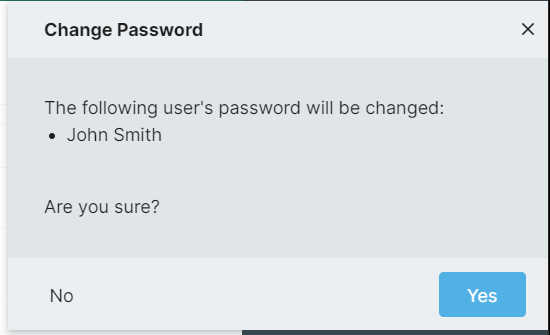
2. Click the Yes button
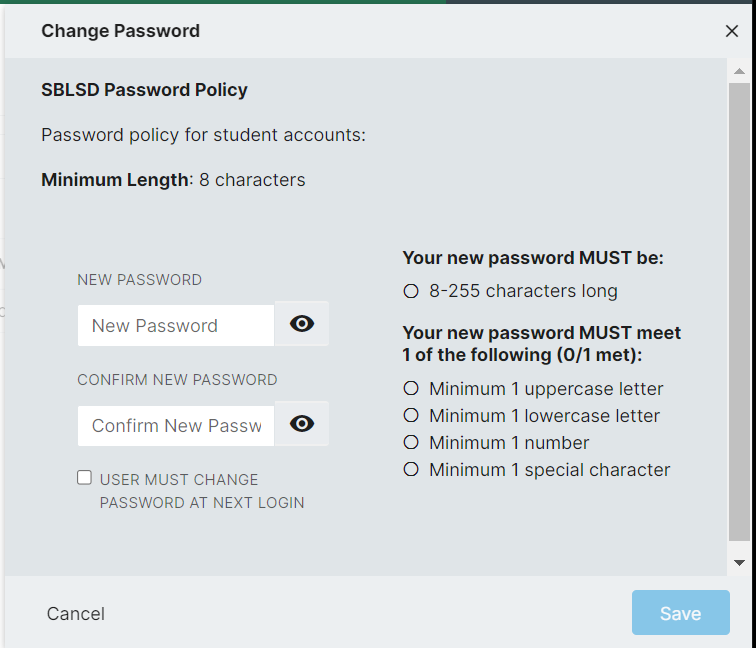
3. Enter a new password that complies with the minimum requirements for the account's password policy. If the account belongs to a secondary student (6-12), we recommend selecting the User Must Change Password At Next Login option so that the student may set their own password after re-gaining access to their account.
4. Click the Save button
It may take several seconds for the password change to complete depending on the current system load

