How to Claim Your Account
Overview of Account Claiming
Claiming a RapidIdentity account is a process which involves the following:
- Proving ownership of the account via a claim code
- Agreeing to the SBLSD's Acceptable Use Policy (AUP)
- Setting a new password
- (Optionally) Setting challenge questions which are used in the event you forget your password.
Claim Codes
A claim code is a token which the owner of the account has knowledge of and is used to prove that the person accessing an account is the owner of it. For SBLSD accounts, the claim code is based on your employee ID or student ID.
Staff Claim Codes
-
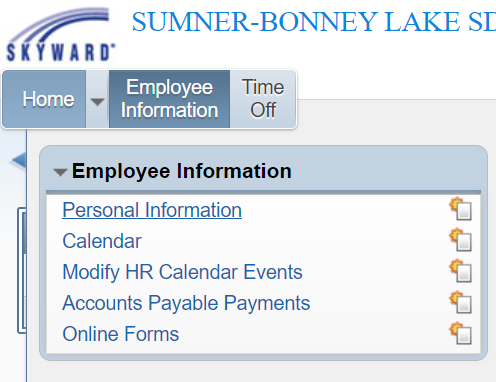
Login to Skyward and go to Employee Access
-
Click on Employee Information > Personal Information
-
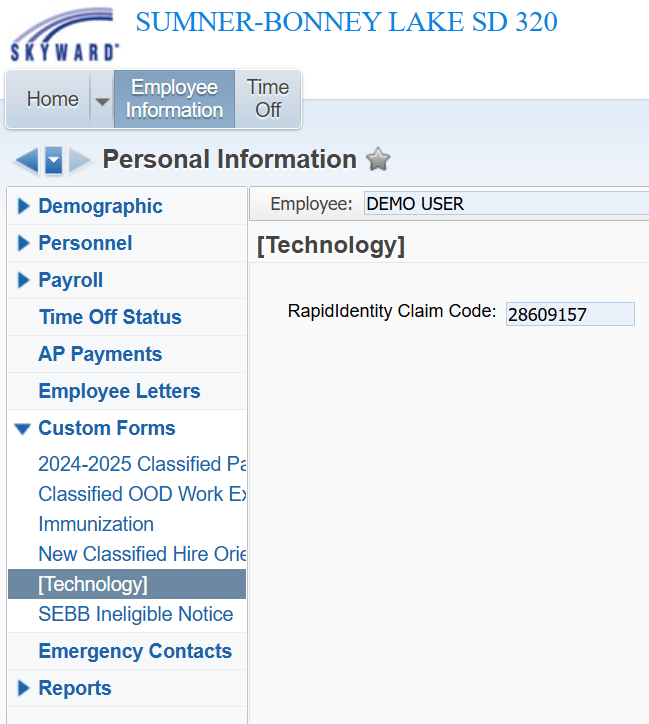
Click on Custom Forms > [Technology]. Your RapidIdentity claim code is displayed in the form.
Student Claim Codes
For students, the claim code is your student ID with leading zeroes if your ID is under 8 characters long. For example:
| Student ID | Claim Code |
| 0123456 | 00123456 |
| 1234567 | 01234567 |
New Password Requirements
| Students |
Minimum Length
|
| Staff |
Minimum Length
At least 3 of the following:
|
Claiming Your Account
Windows
1. Open the Chrome browser
2. Navigate to https://sblsd.us001-rapididentity.com/
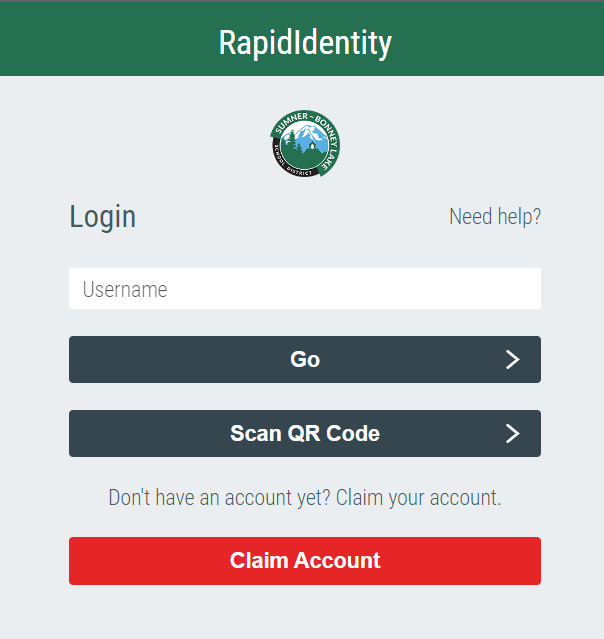
3. At the RapidIdentity login screen, click the Claim Account button.
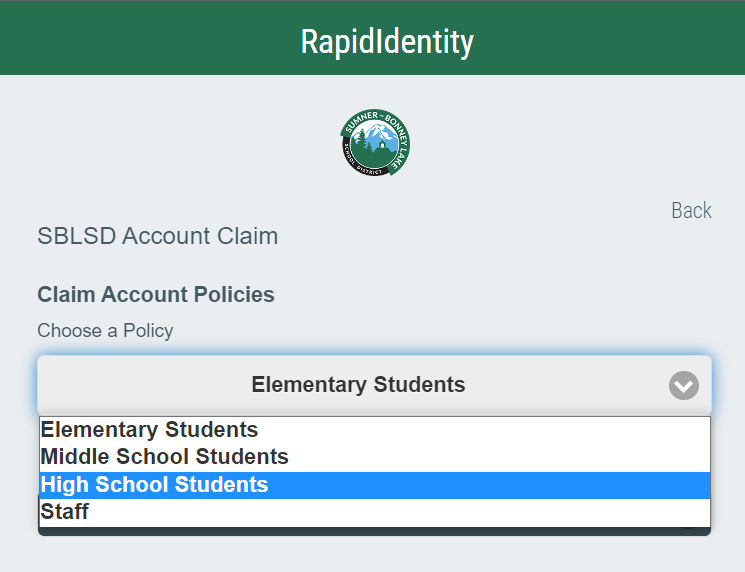
4. Click on the dropdown list and select the claim policy that applies to you, then click the Next button
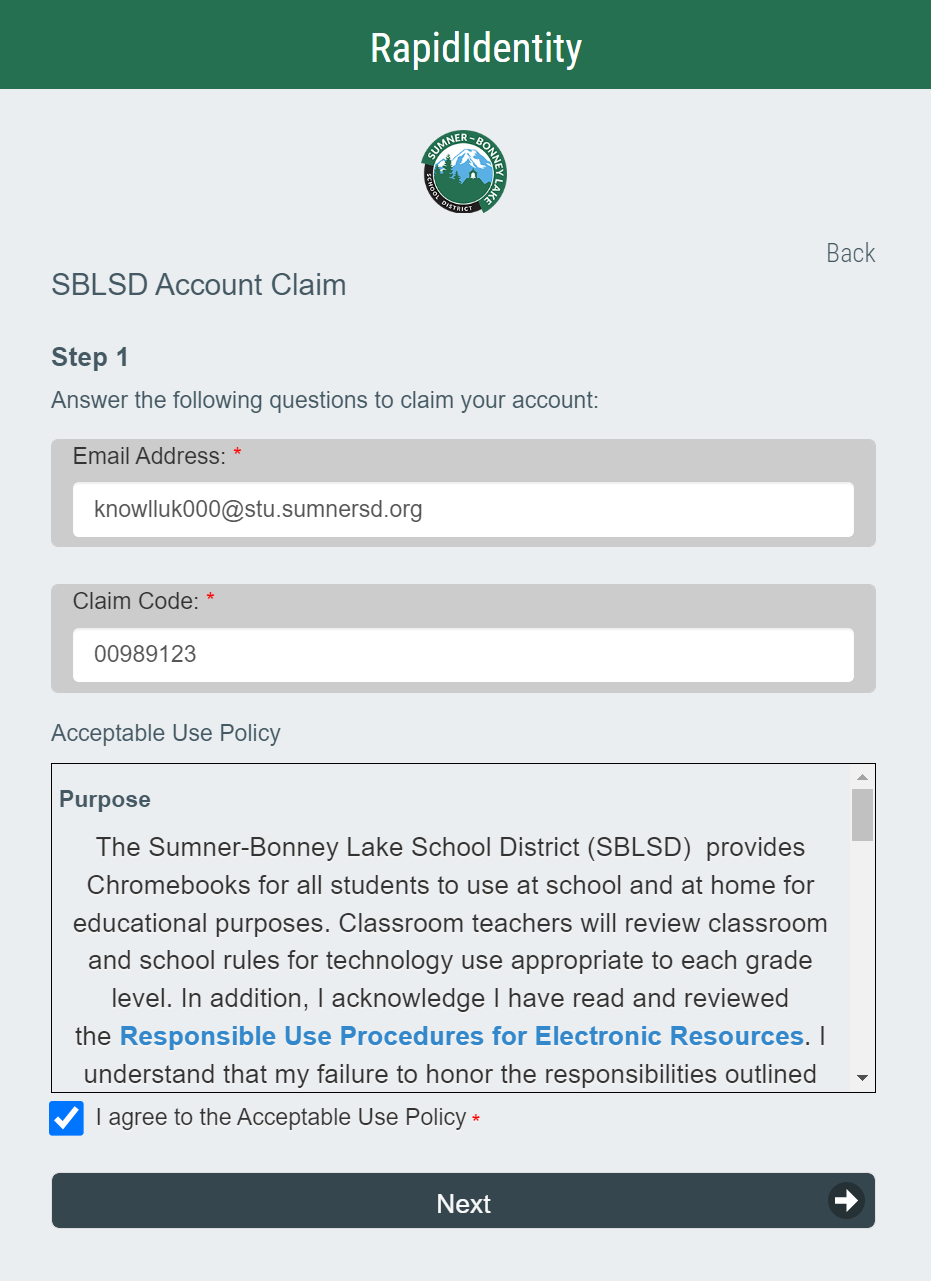
5. On the following page, enter your email address and claim code. Agree to the Acceptable Use Policy, then click the Next button
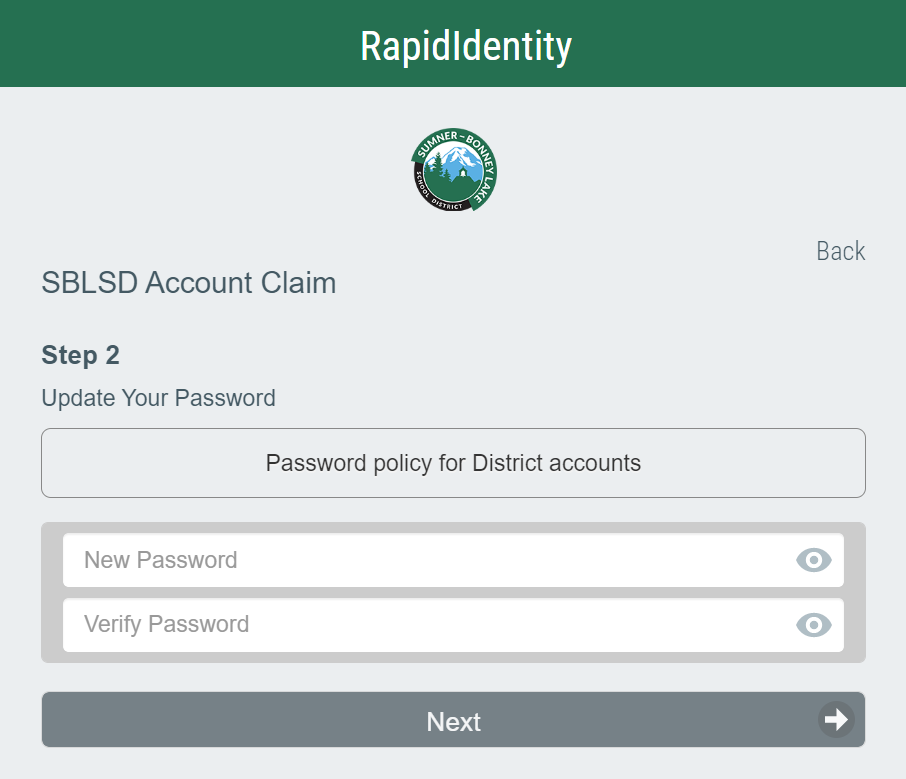
6. Set your new password (refer to the New Password Requirements section for the minimum requirements), then click the Next button. This will be the password you use to log in to RapidIdentity, Google, and SBLSD Windows devices going forward.
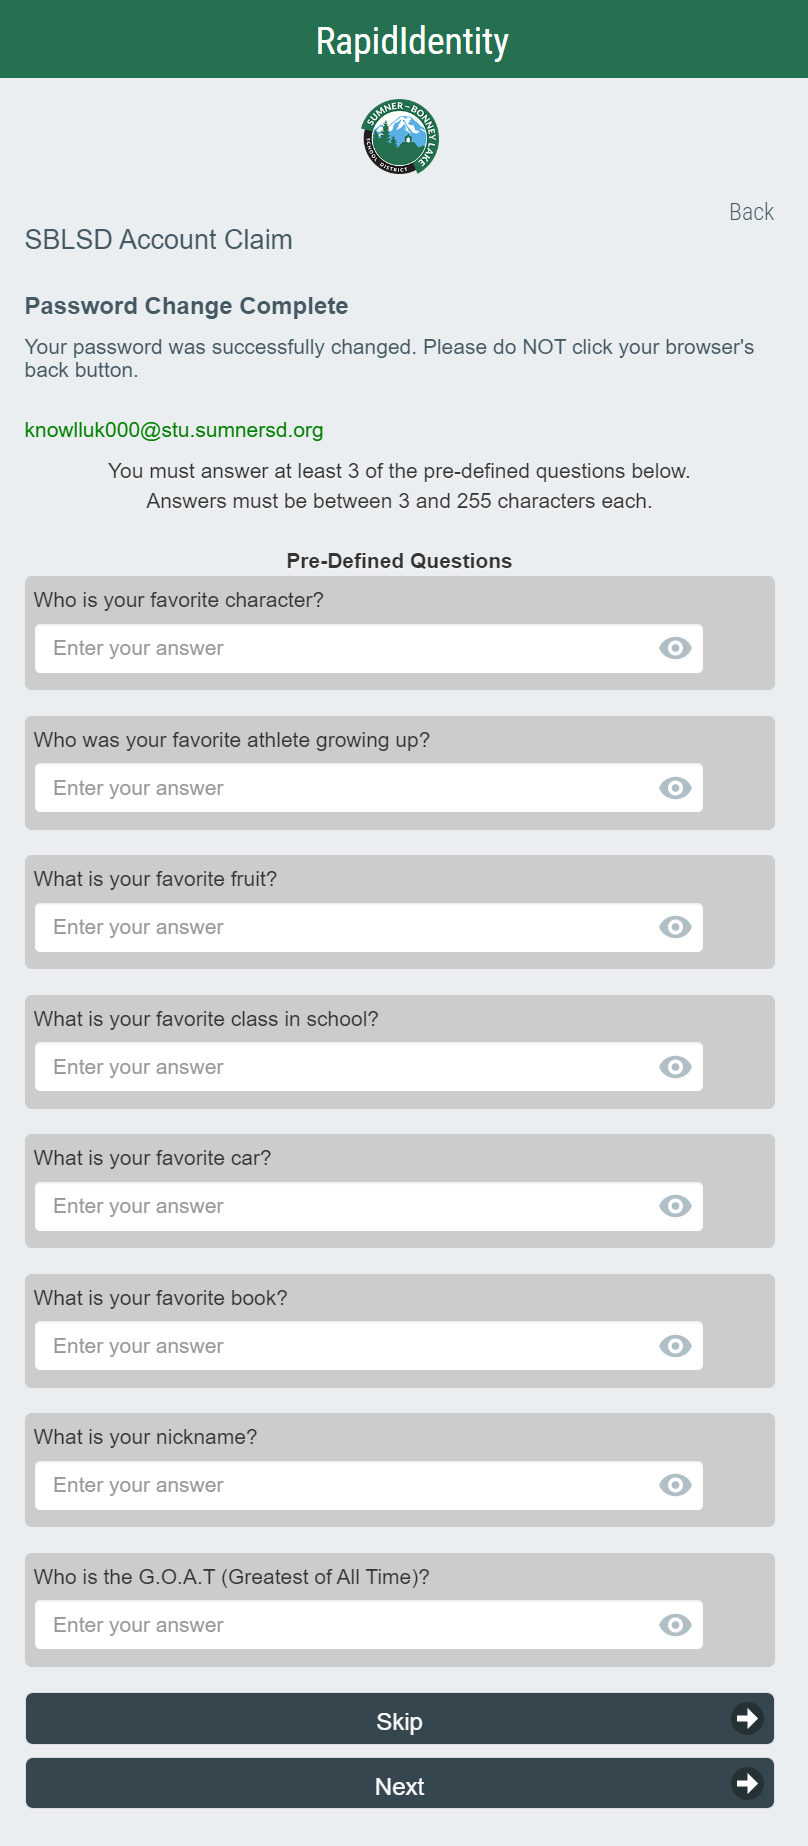
7. (Optional, but recommended) Set answers to at least 3 challenge questions, then click the Next button. If you would prefer to set challenge questions later, click the Skip button.
Chromebook
1. On the ChromeOS login screen, click the Add Person button located near the bottom left of the screen.
2. If prompted by a white message box, click Next
3. Proceed from step 3 of the instructions in the Windows section.

No Comments